Quickstart (n8n) - Creating a document in an n8n workflow
Here's how to create PDF documents in an n8n workflow with DocuPotion.
- Install the DocuPotion community node and add credentials
- Create a reusable template
- Trigger document generation in your n8n workflow
Install the DocuPotion node and add credentials
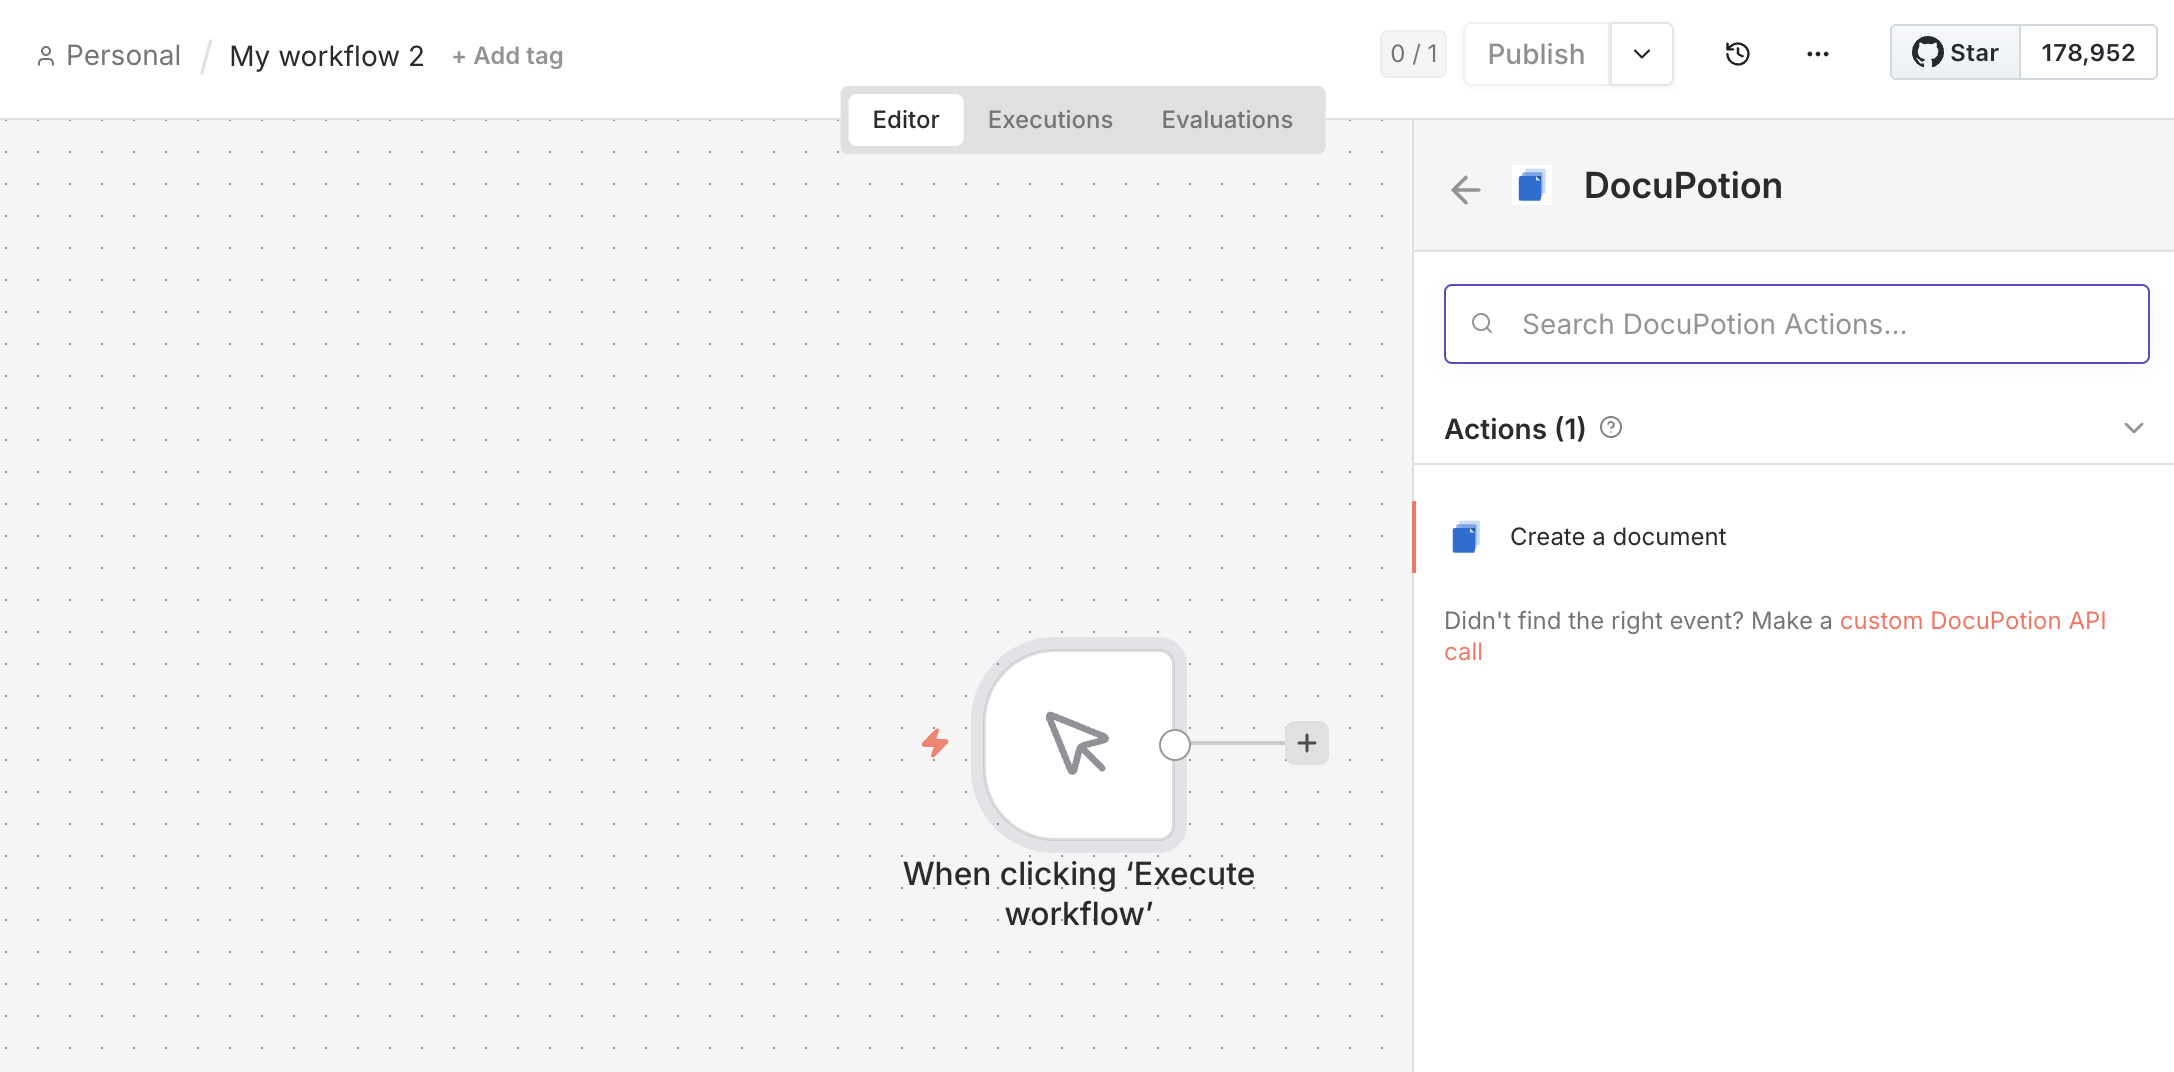
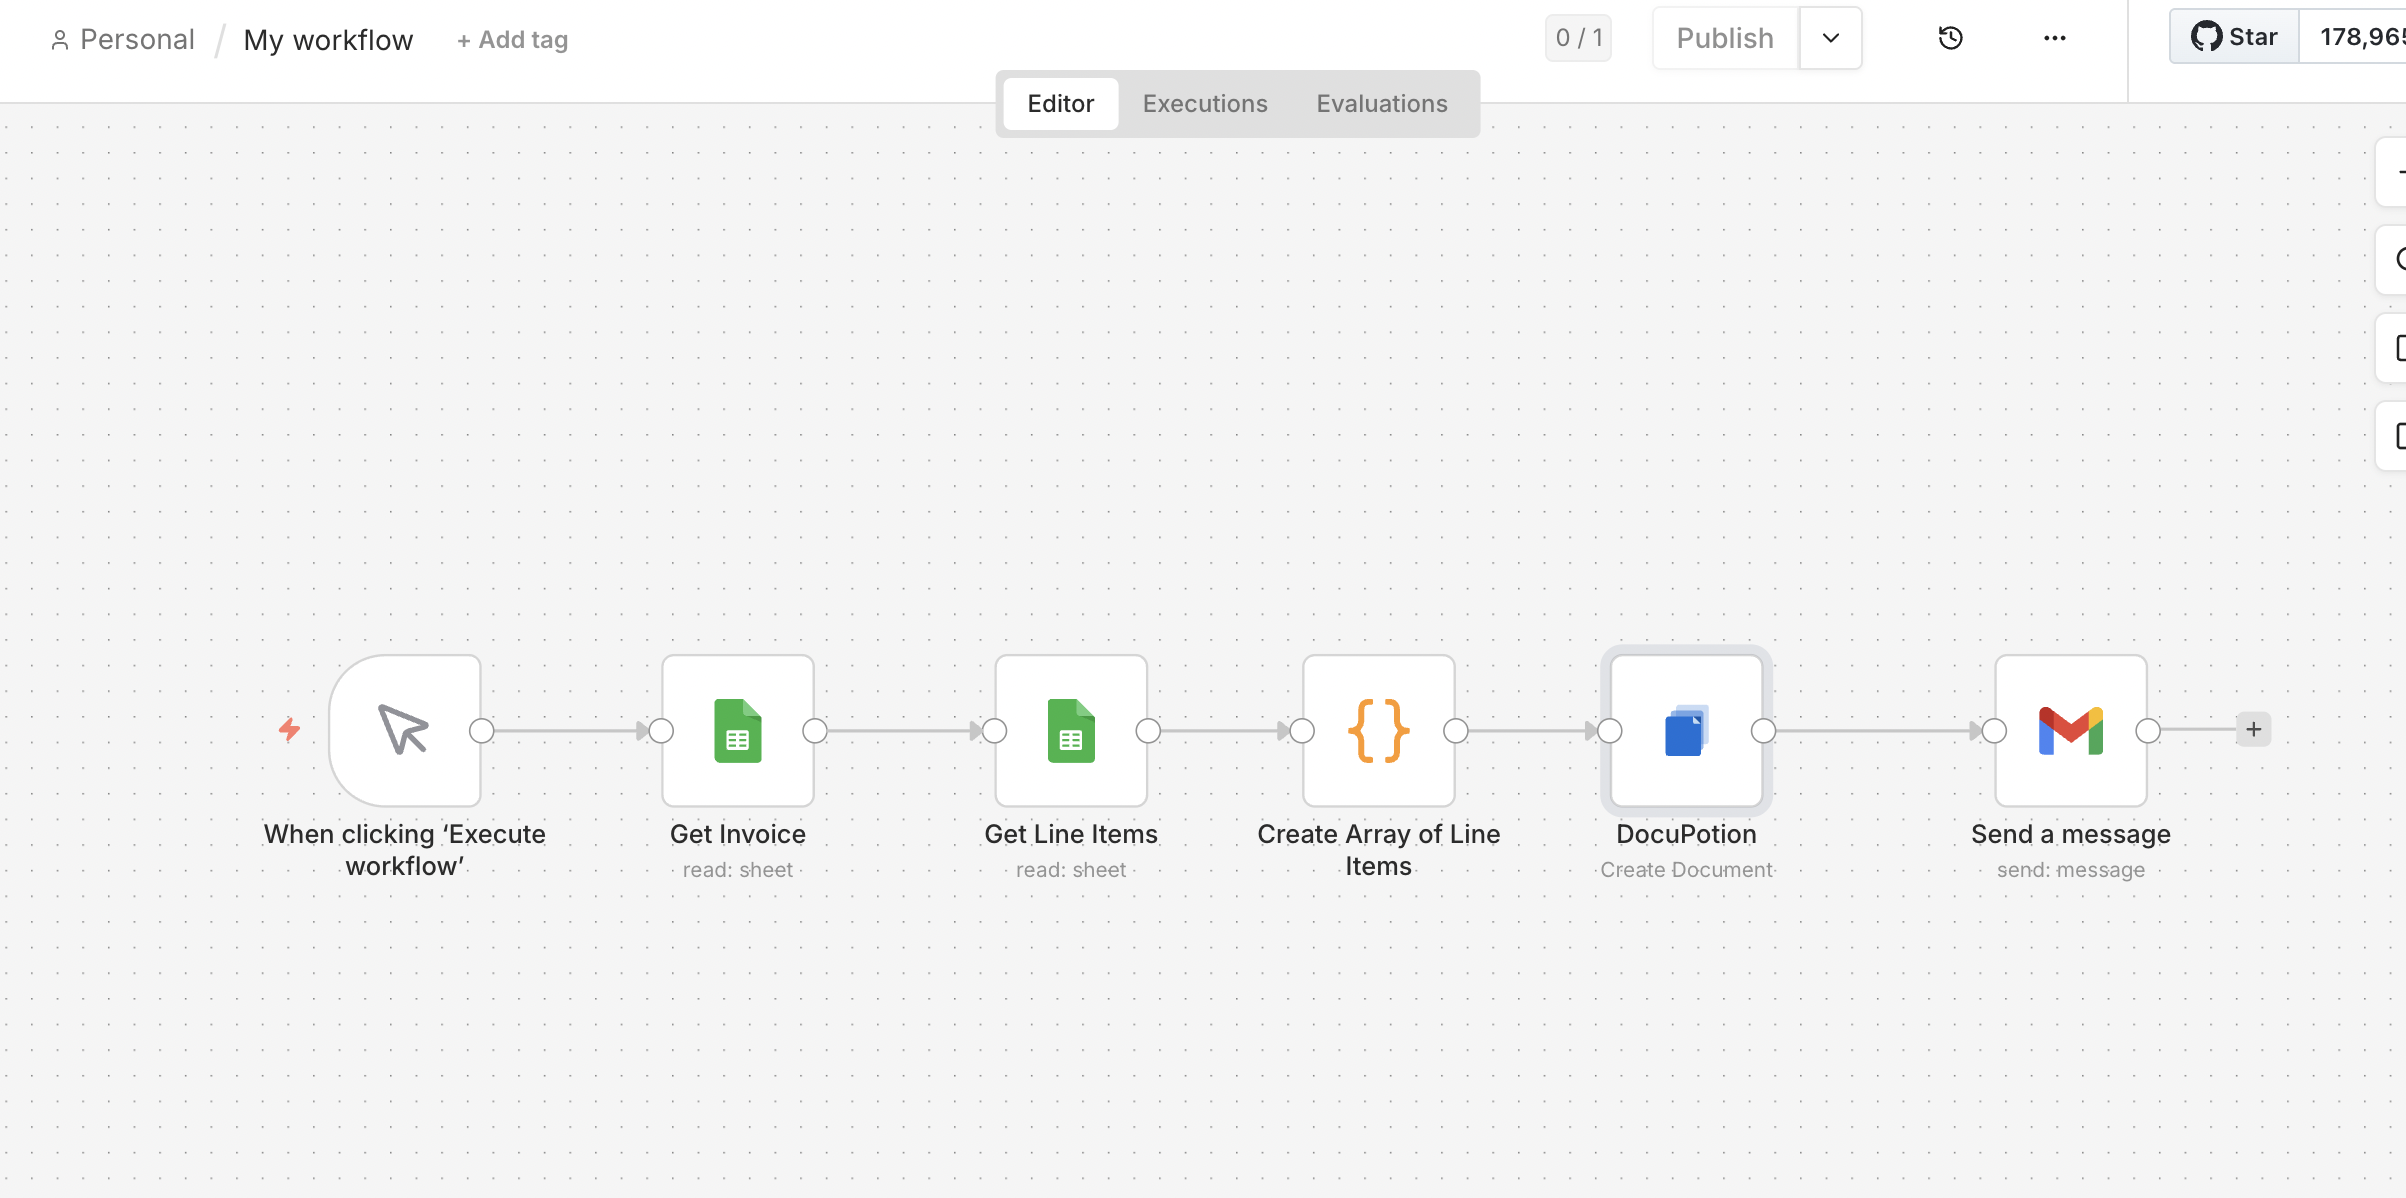
In any n8n workflow, search for the DocuPotion community node from the canvas and drop the Create a document action in.
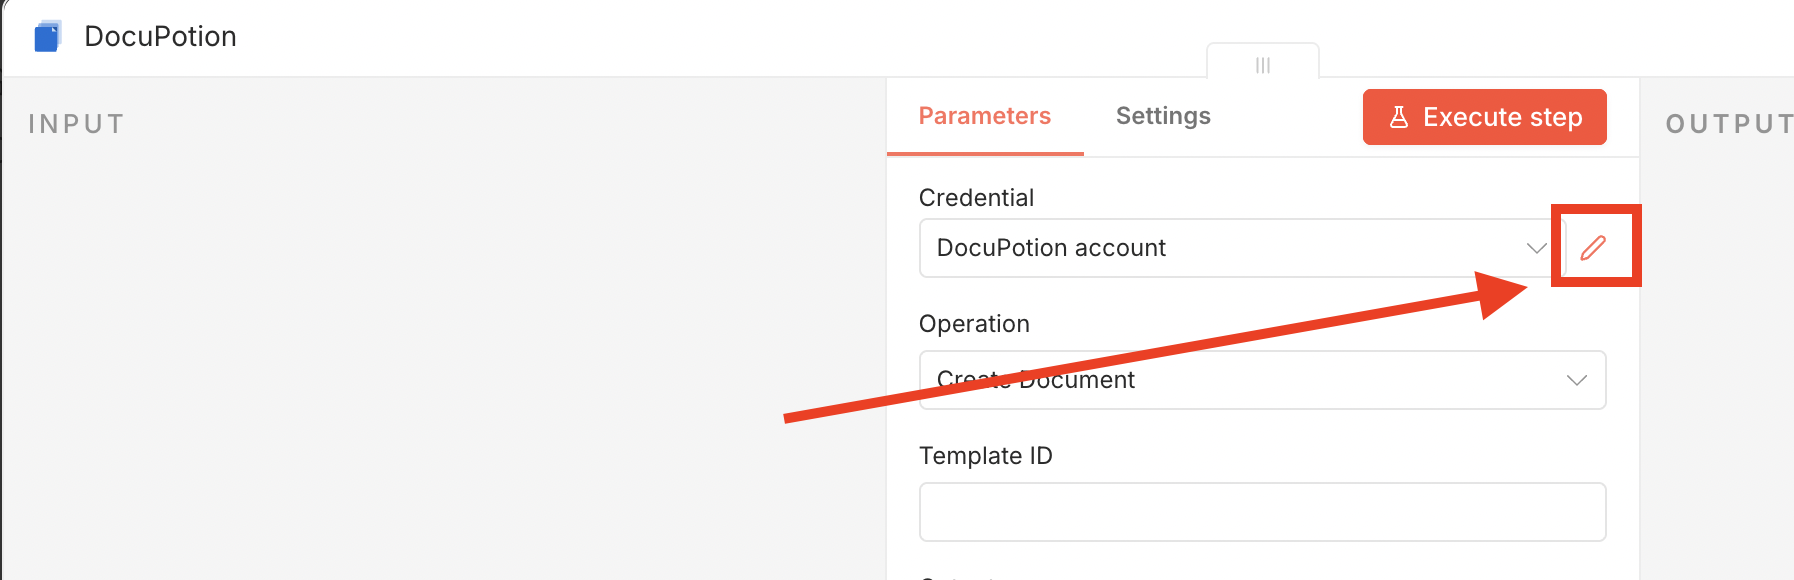
Click the pencil icon next to the Credential input to add your DocuPotion API key.
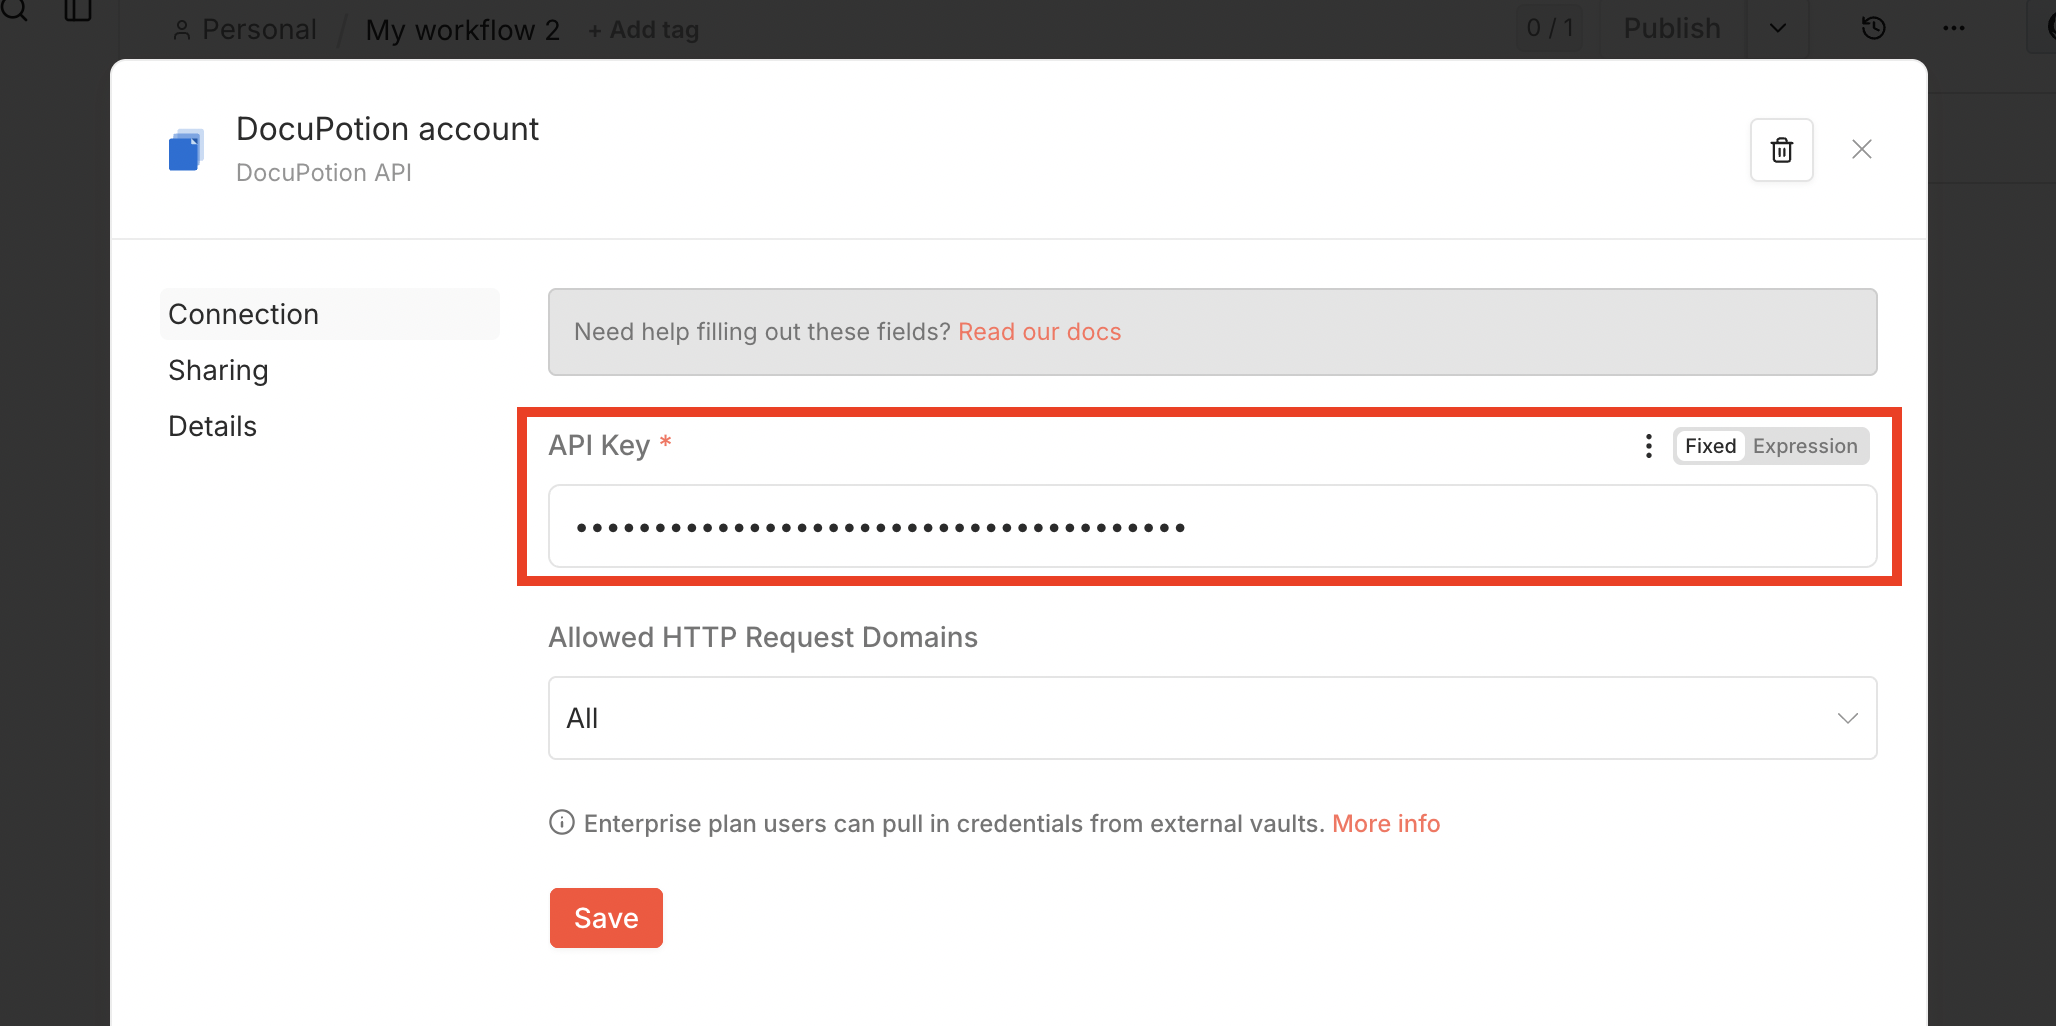
Get your DocuPotion API Key from the API Integration tab of your DocuPotion dashboard (link here) and paste it into the API Key input.
Create a reusable template
Estimated time: 1-20 minutes (depends on how complex your document is)
Navigate to the Templates section of your DocuPotion dashboard and click on the New Template button. You'll have 3 options for creating a new template:
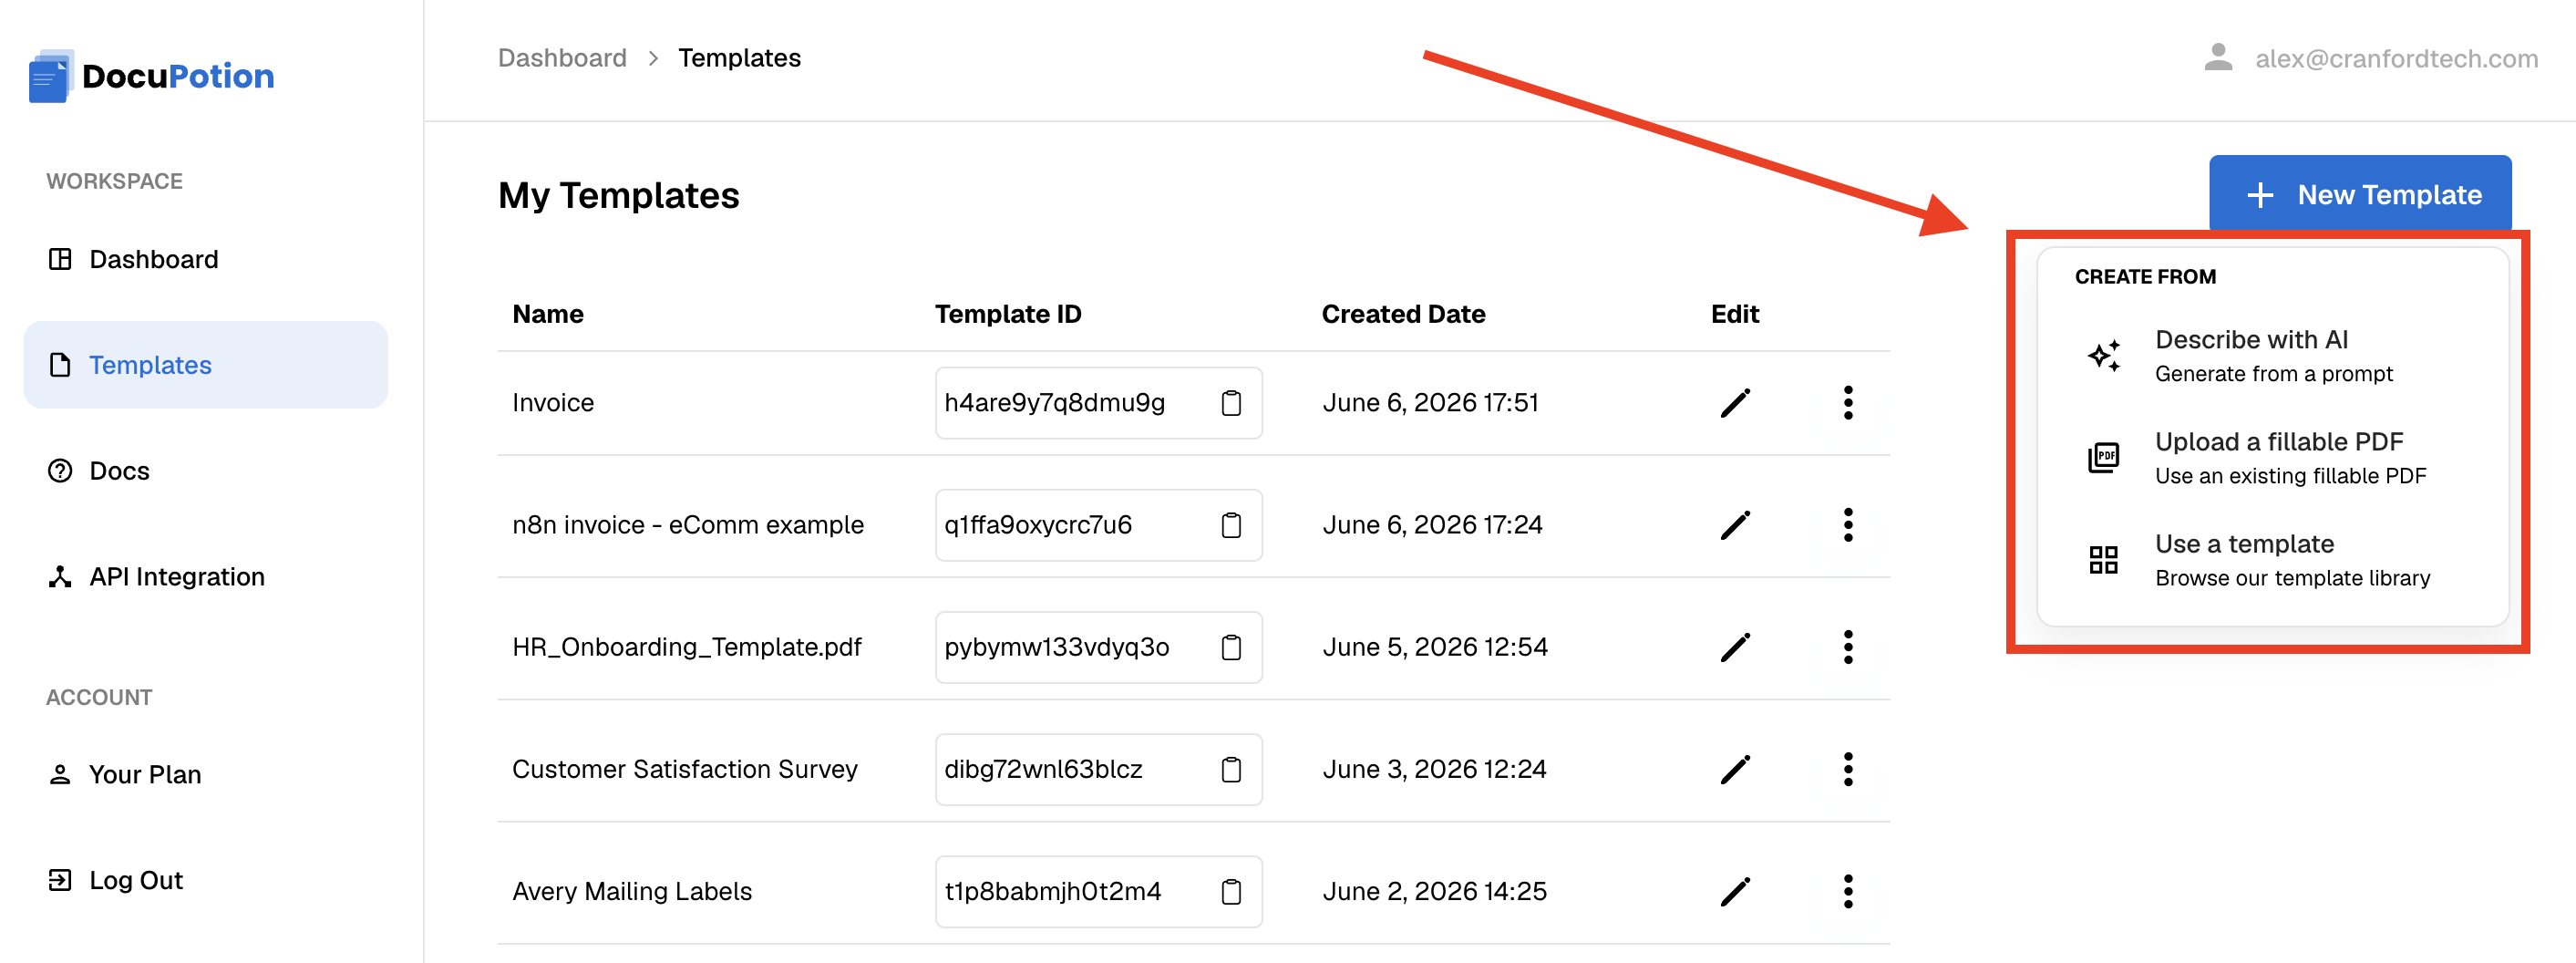
Describe with AI: Create a template based on a prompt. You can also attach existing PDF or HTML files for reference. See this doc for full instructions.
Upload a fillable PDF: Choose this option if you have an existing fillable PDF and you want to automatically populate it using DocuPotion. See this doc for full instructions.
Use a template: Our library templates cover a range of common use cases like invoices, contracts, certificates and more. You can pick a library template and then refine it with follow-up AI prompts (like you would interact with Chat GPT. See this doc for full instructions.
Once you've picked an option, you'll be brought to the DocuPotion template editor.
Trigger document generation in your n8n workflow
Back in n8n, configure the Create a document action on your DocuPotion node.
Fields in the Create Document action
- Template ID - The ID shown next to the template name at the top-right of the template editor. Copy–paste it here
- Output - Pick one: File (recommended — hands n8n a binary file you can email, upload, etc.), URL (returns a signed link), or base64 (returns the raw encoded string)
- File Name - The filename for the generated PDF, e.g.
invoice-{{invoice_number}}.pdf. Supports n8n expressions. - Template Data - Add your template data as a JSON object. This is the data that will replace the
{{merge fields}}in your template.
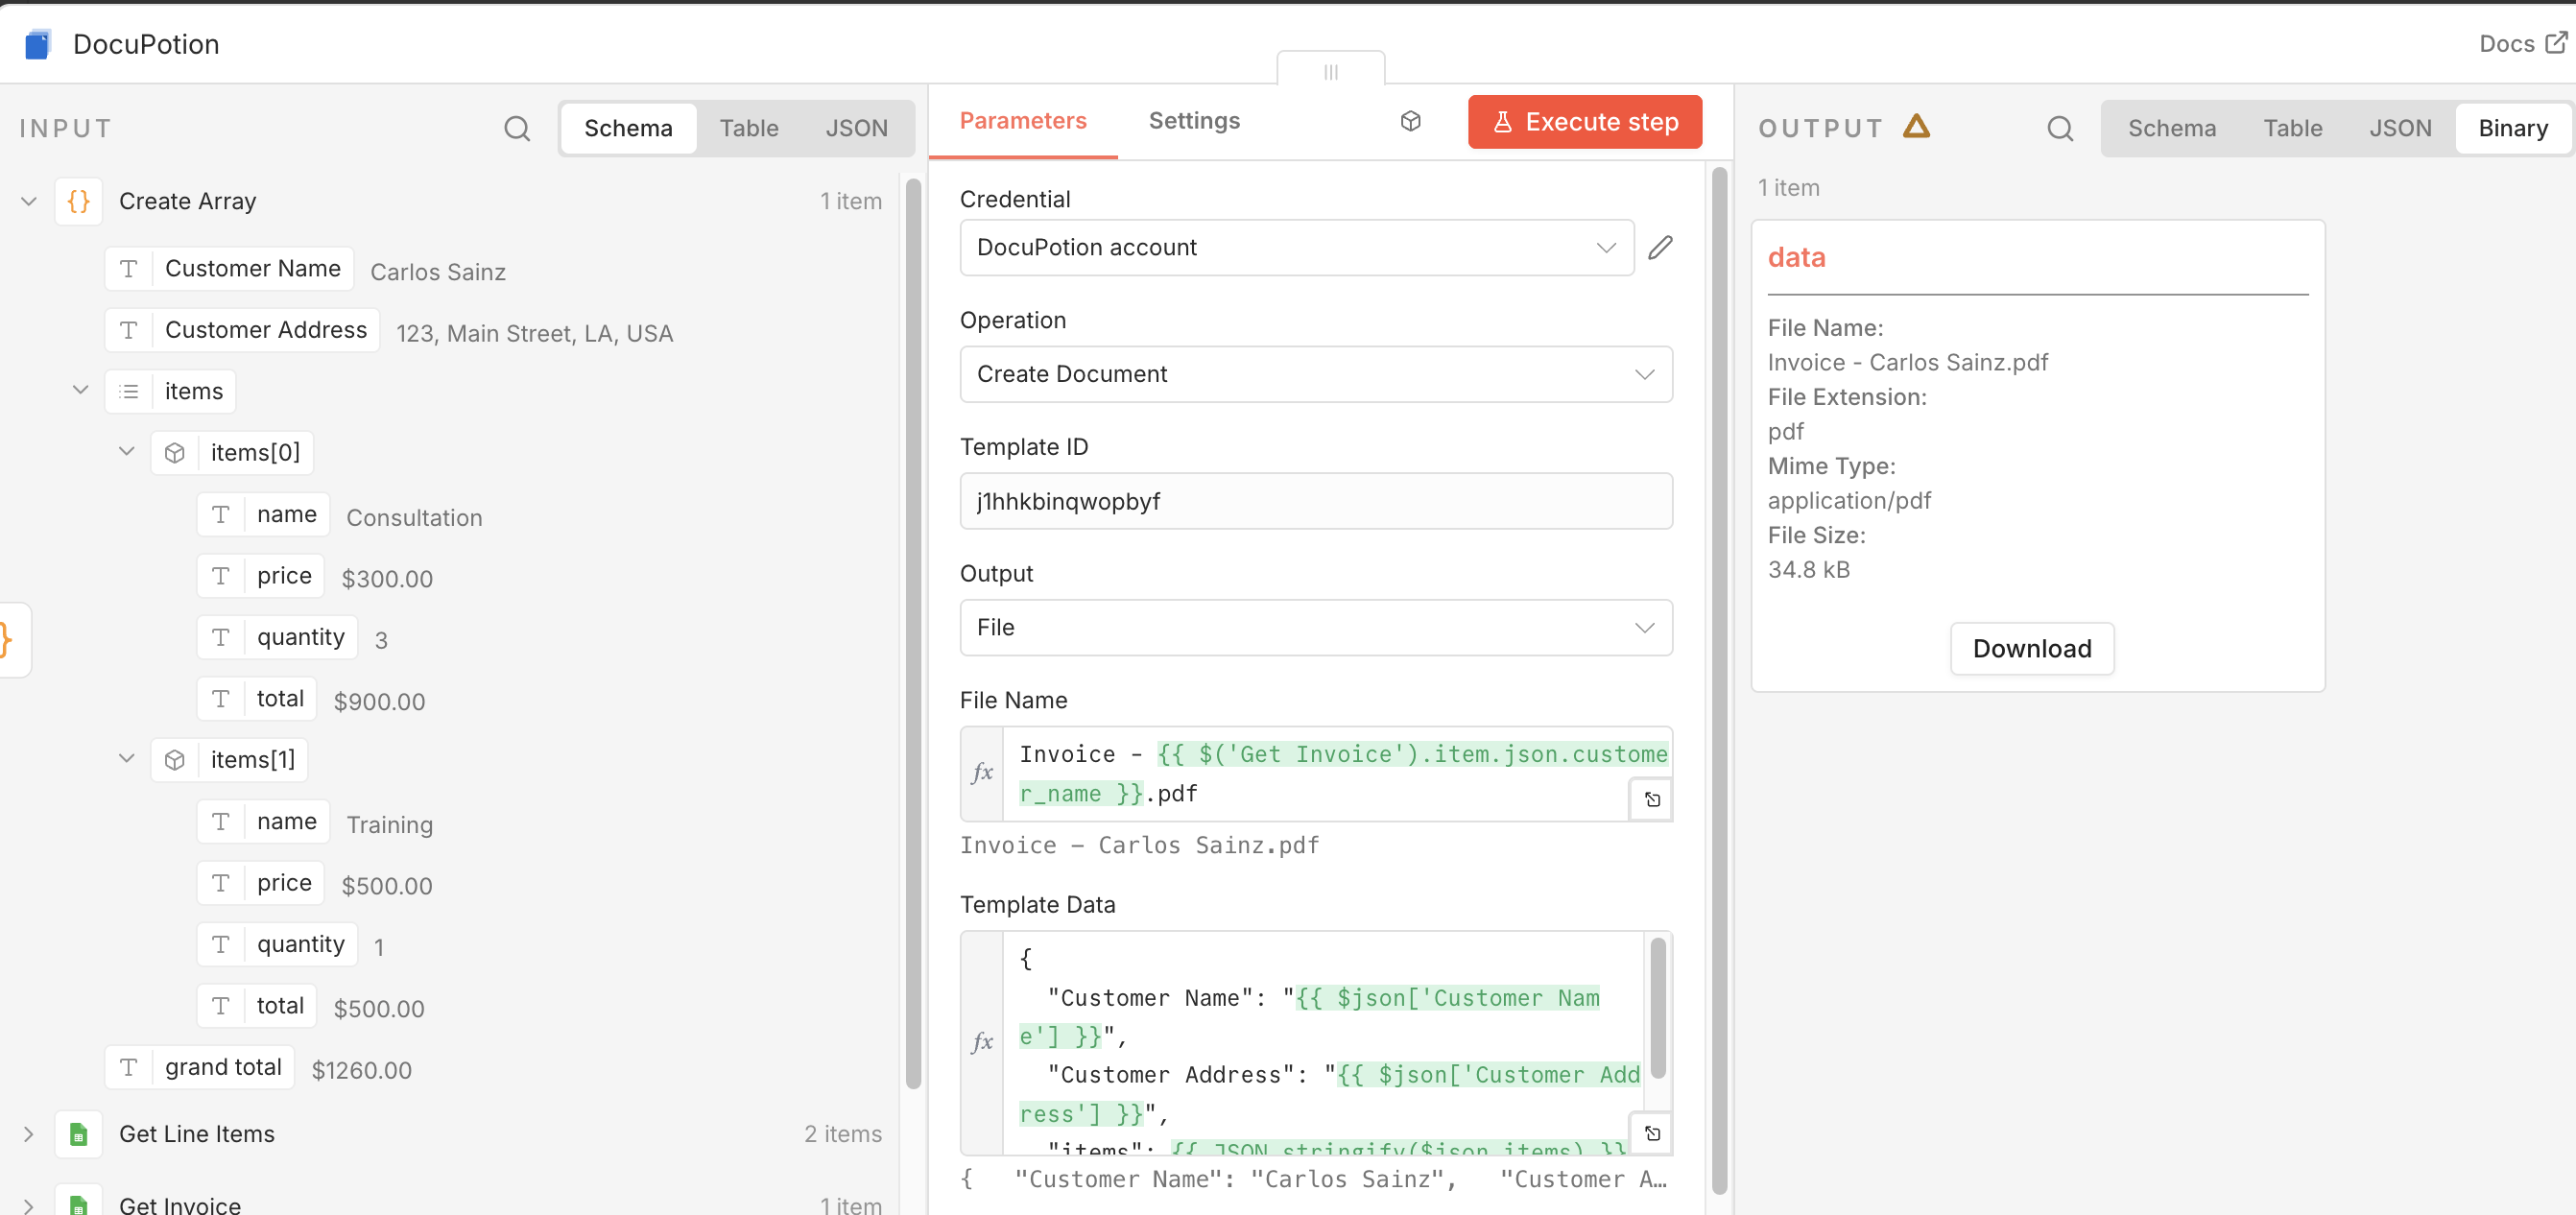
Tip: You can get the structure of the JSON required for Template Data in the Data section of the template editor. You can then replace the values with output from previous steps in your n8n workflow.

Run the workflow. The node returns the generated PDF in whichever output format you picked. Pipe it straight into an email node, a Drive upload, a webhook, or anywhere else n8n can reach.