Collect e-signatures from Attio records
With the DocuPotion app for Attio, your team can generate a document from any record and send it for e-signature in the same click. Each signer receives their own signature request by email, everyone can sign from any device, and when the last signature lands the sealed copy is attached back to the record and emailed to all parties automatically.
This guide assumes you have already connected DocuPotion and Attio. If not, start with the Attio quickstart guide.
Step 1: Add signature fields to your template
DocuPotion needs to know where each person signs. How you place the fields depends on your template type:
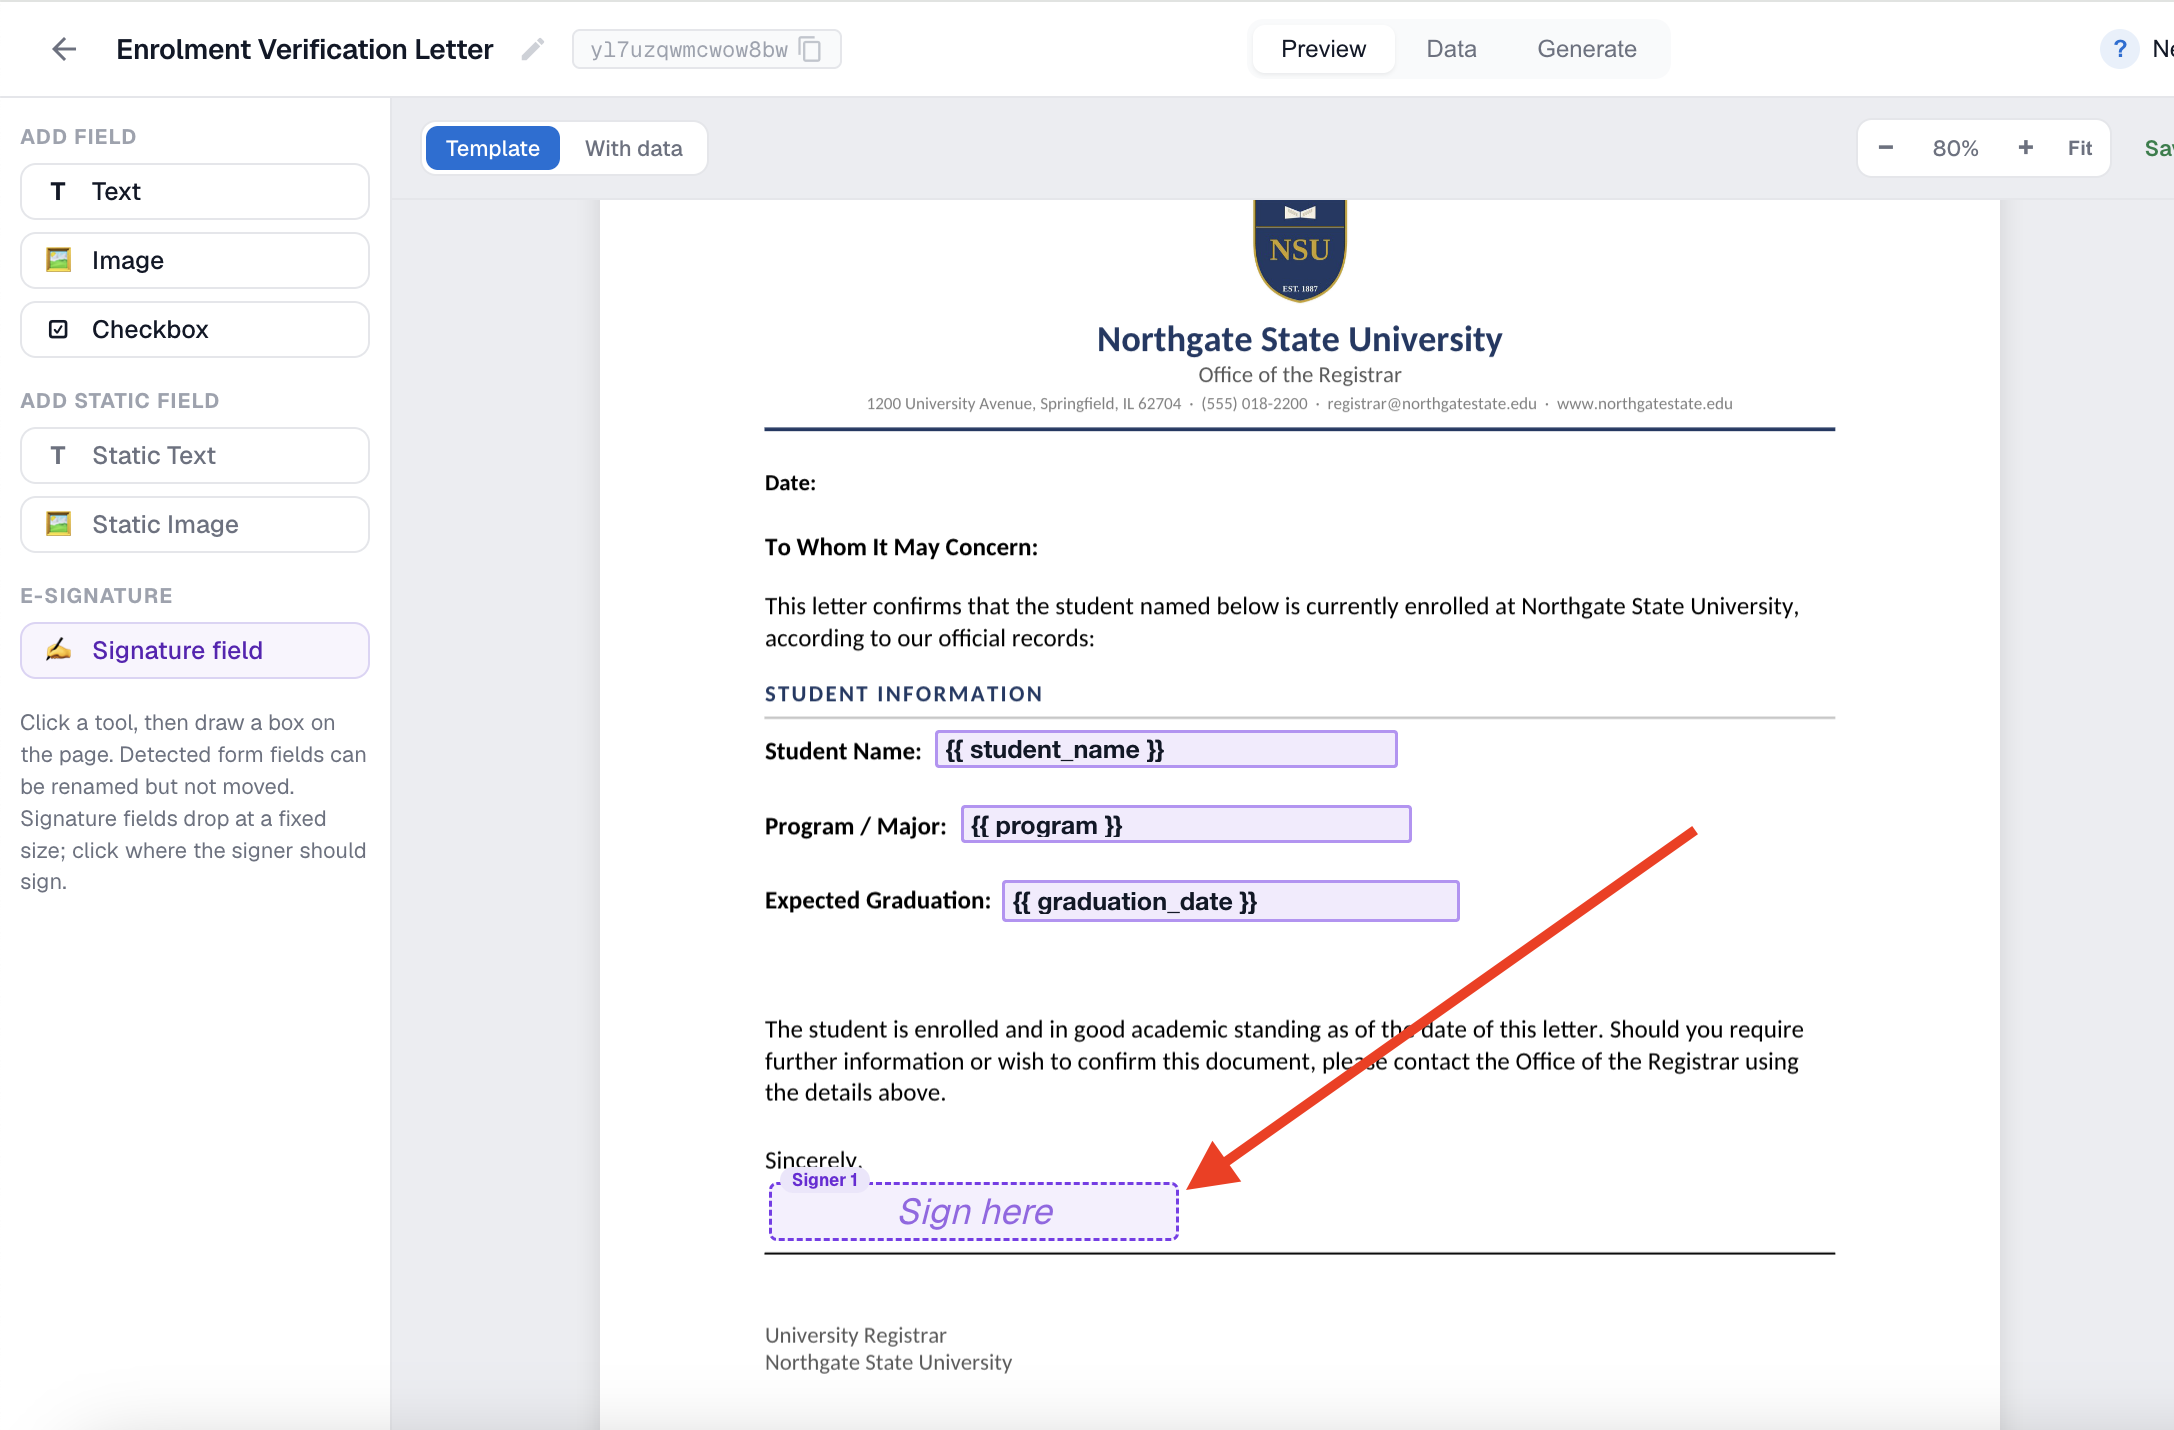
PDF templates: open your template in the editor and use the Signature field tool in the left-hand palette. Click where the signer should sign; the field drops at a fixed size. Each field belongs to a signer (Signer 1, Signer 2, and so on, up to 5). You can also add date, initials and text fields per signer from the E-Signature card.
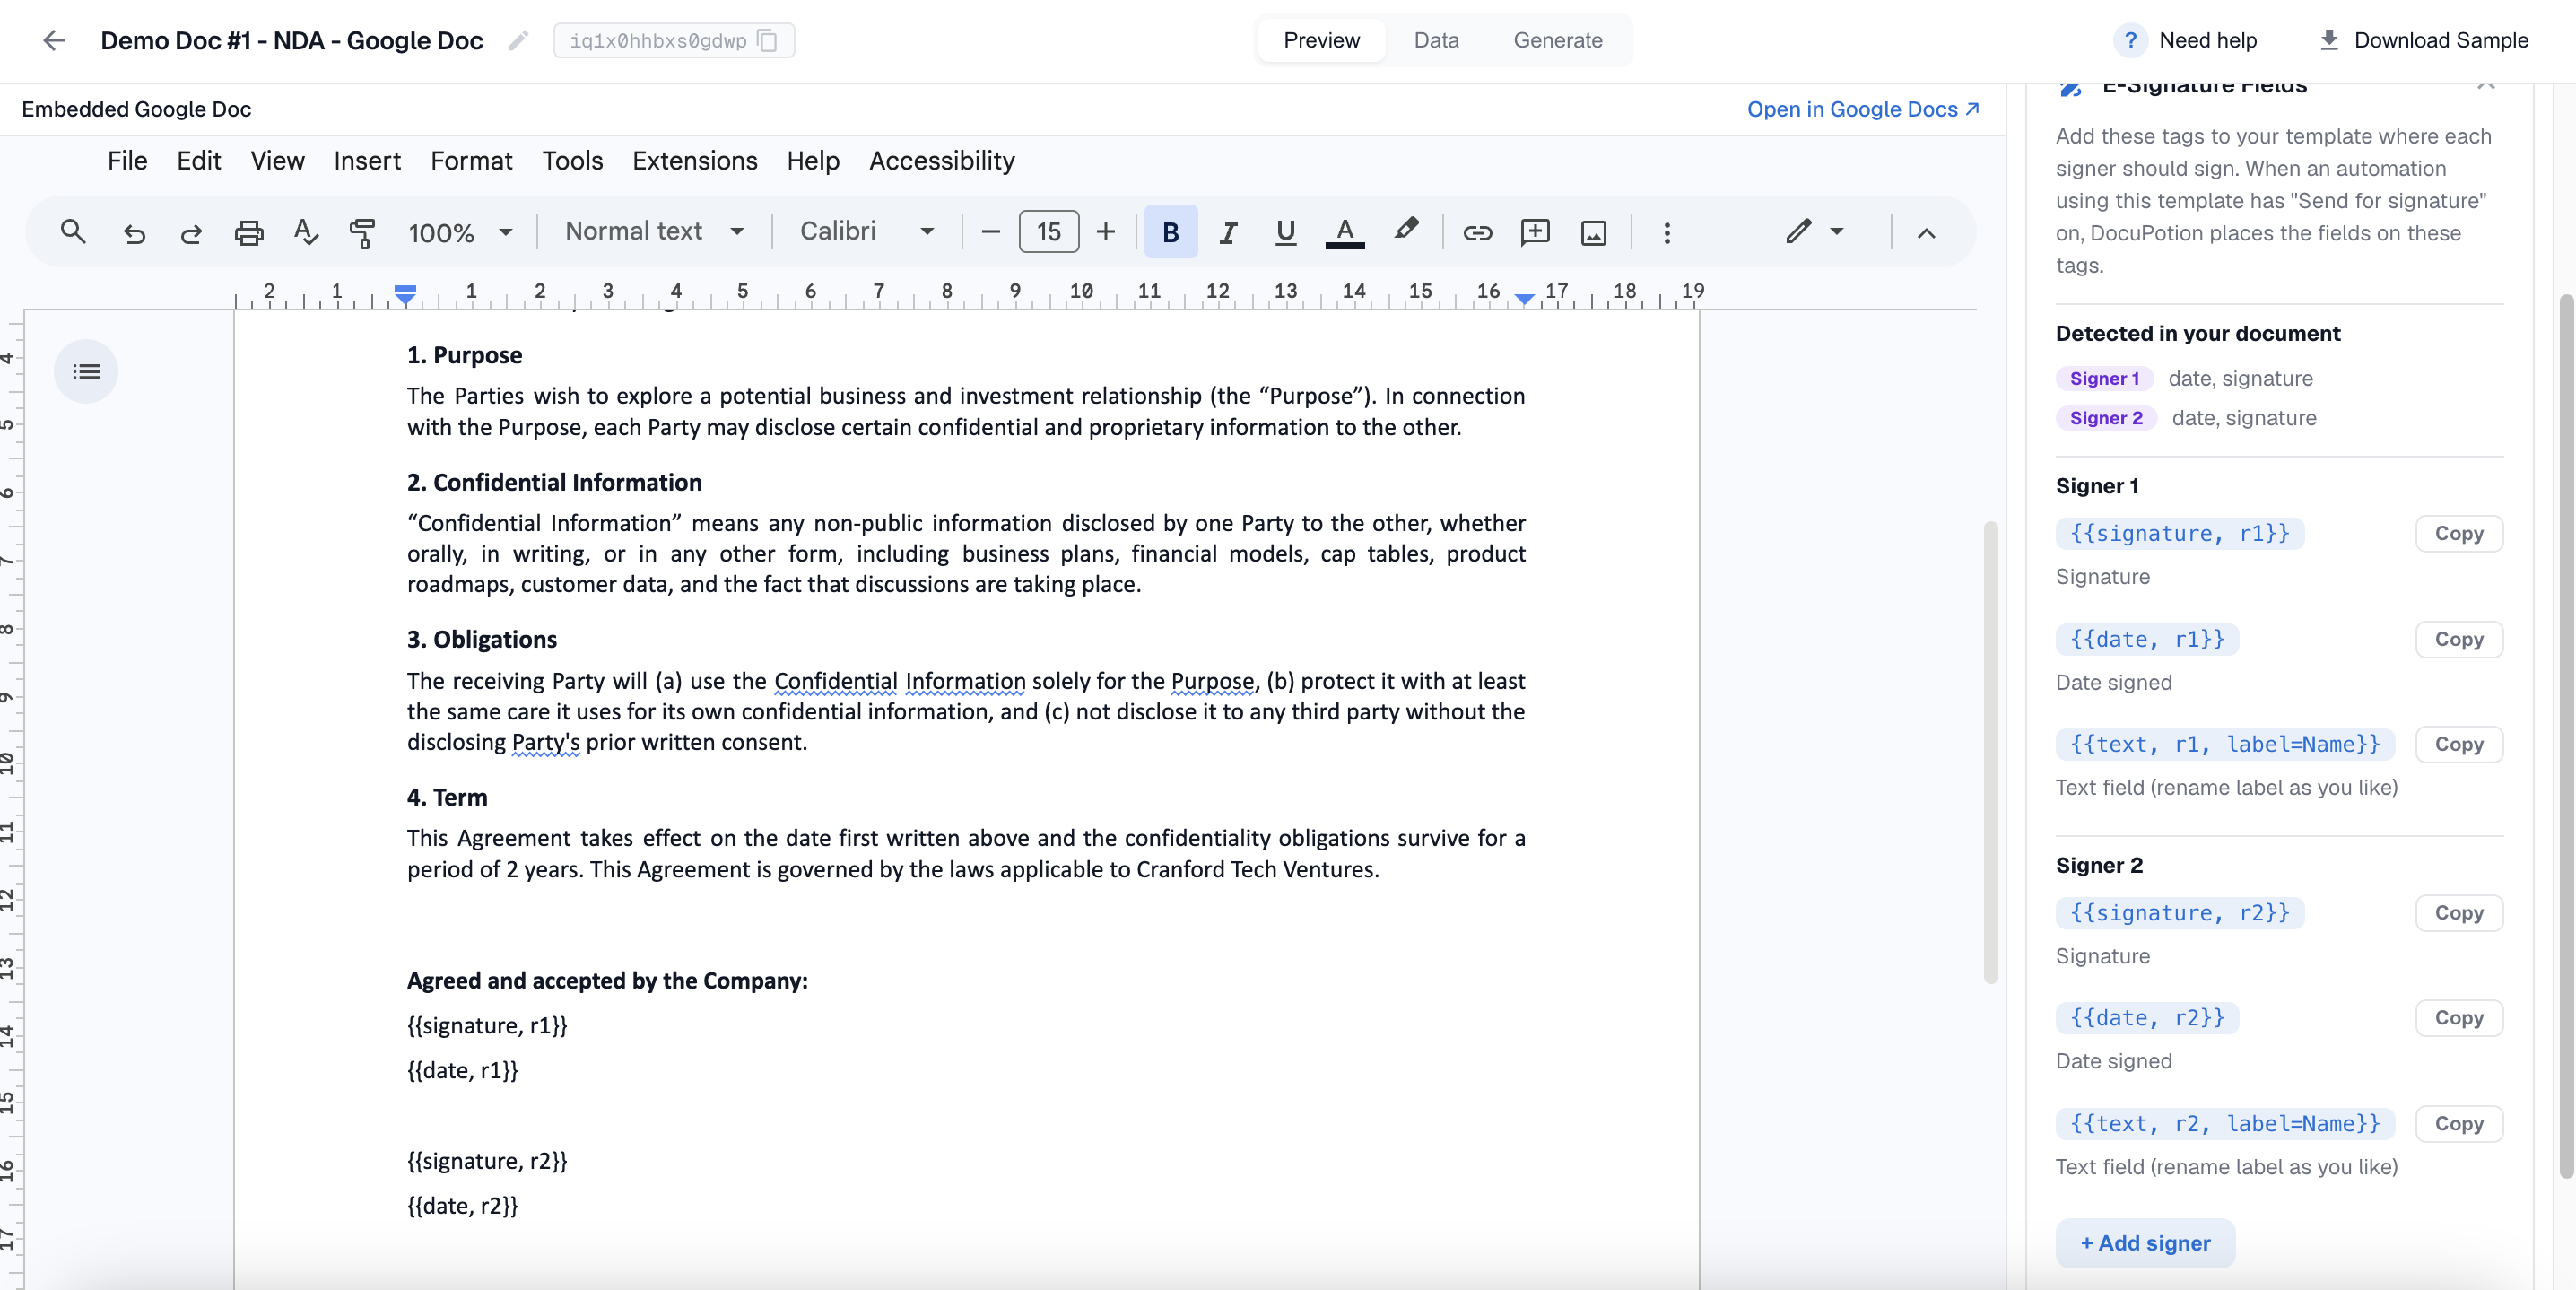
Google Docs templates: place signature tags directly in your Doc using the E-Signature card in the editor, for example:
{{signature, r1}}
{{date, r1}}
r1 means Signer 1, r2 means Signer 2, and so on.
Every signer must have a signature field
A signer can have date, initials and text fields, but they always need at least one signature field too. The editor warns you if a signer is missing one, and the automation will not send without it.
Step 2: Turn on Send for signature in your automation
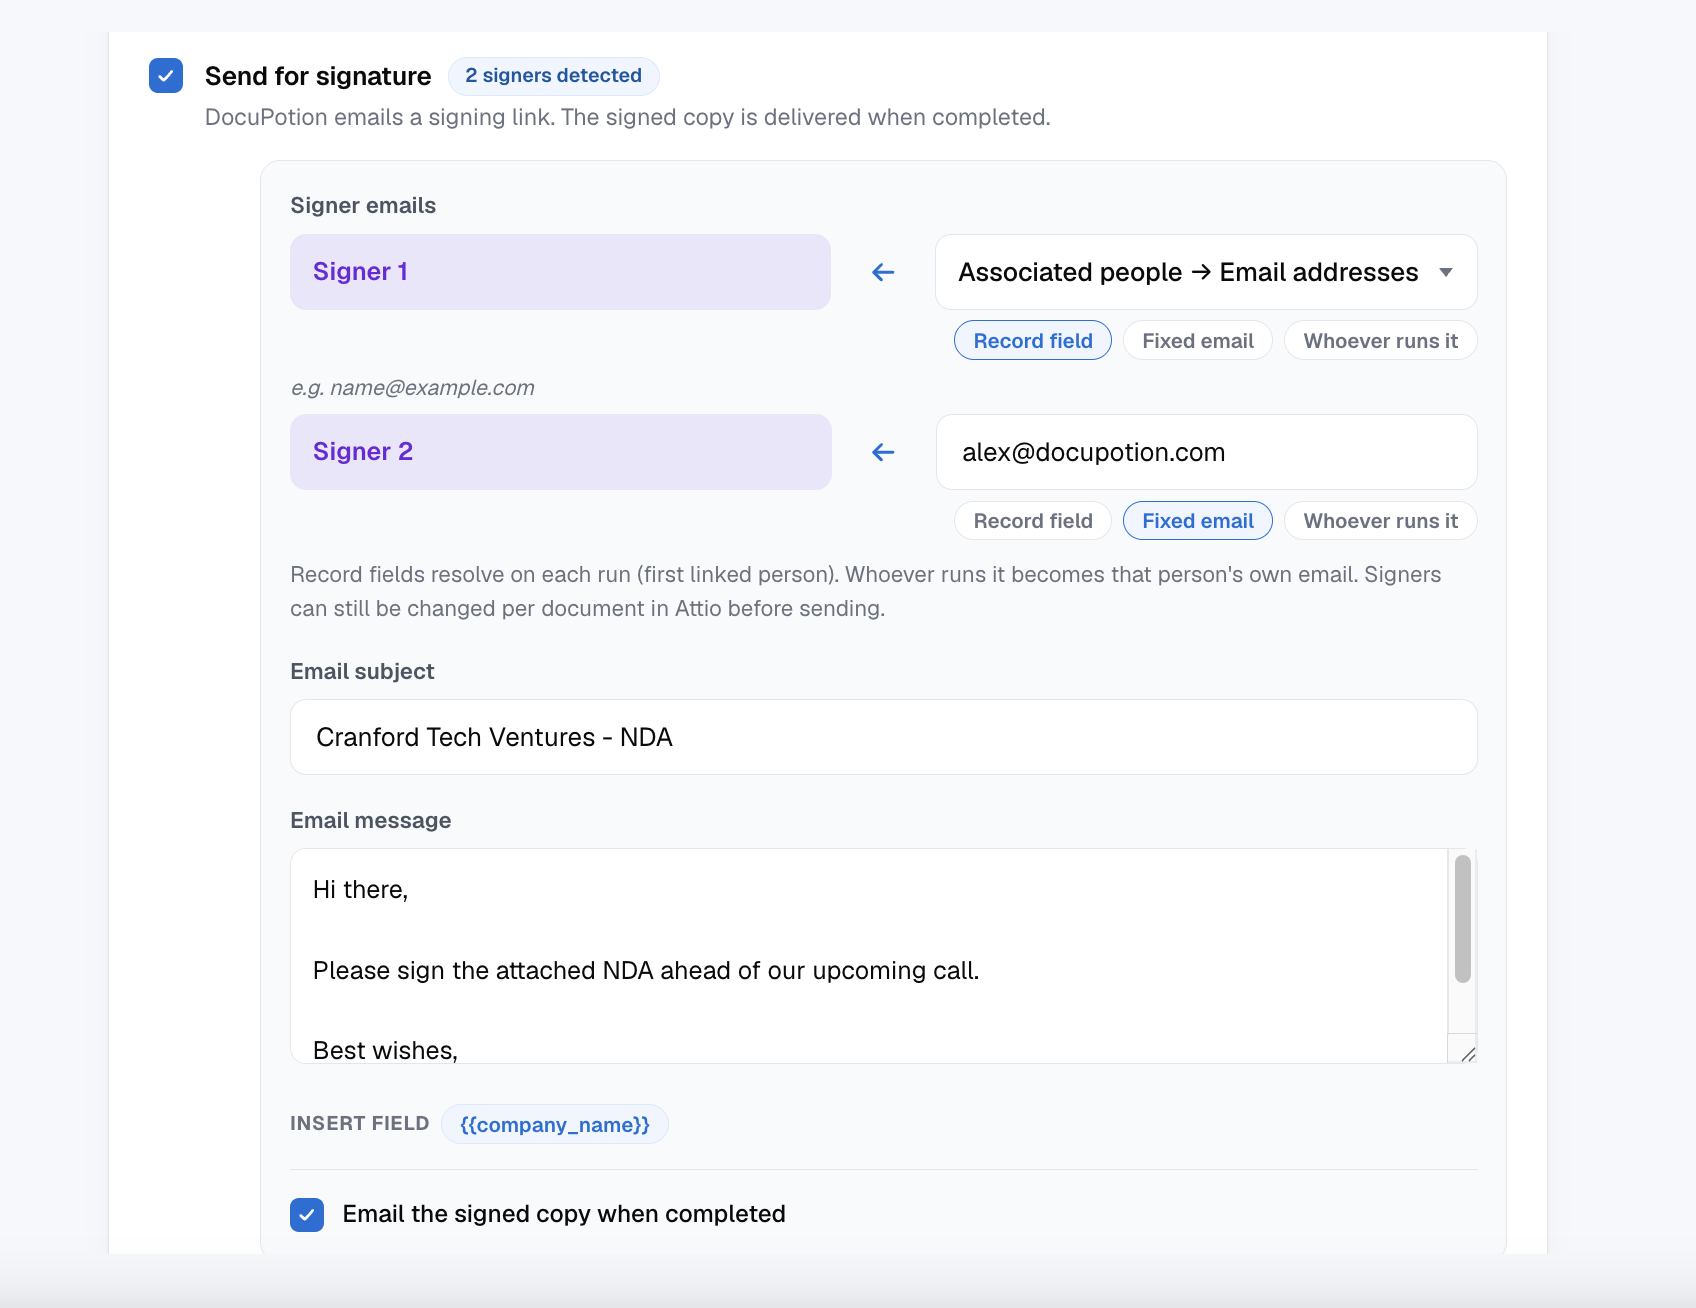
In DocuPotion, open the Automations tab and edit (or create) the automation that uses your template. In the Delivery section, switch on Send for signature. For each signer in the template you choose where their email address comes from:
- Record field: pull the email from the Attio record, for example an associated person's email address.
- Fixed email: always the same address, for example your own countersigner.
- Whoever runs it: the Attio user who clicks Create document.
You can also customise the signature request email's subject and message, and choose whether everyone is emailed the signed copy on completion.
Step 3: Send it from a record
In Attio, open a record and click Create document. The dialog shows the data being pulled from the record and a Signers step where you confirm each signer's email. The addresses are prefilled from your automation's settings; you can pick a different person from the record or type any email address before sending.
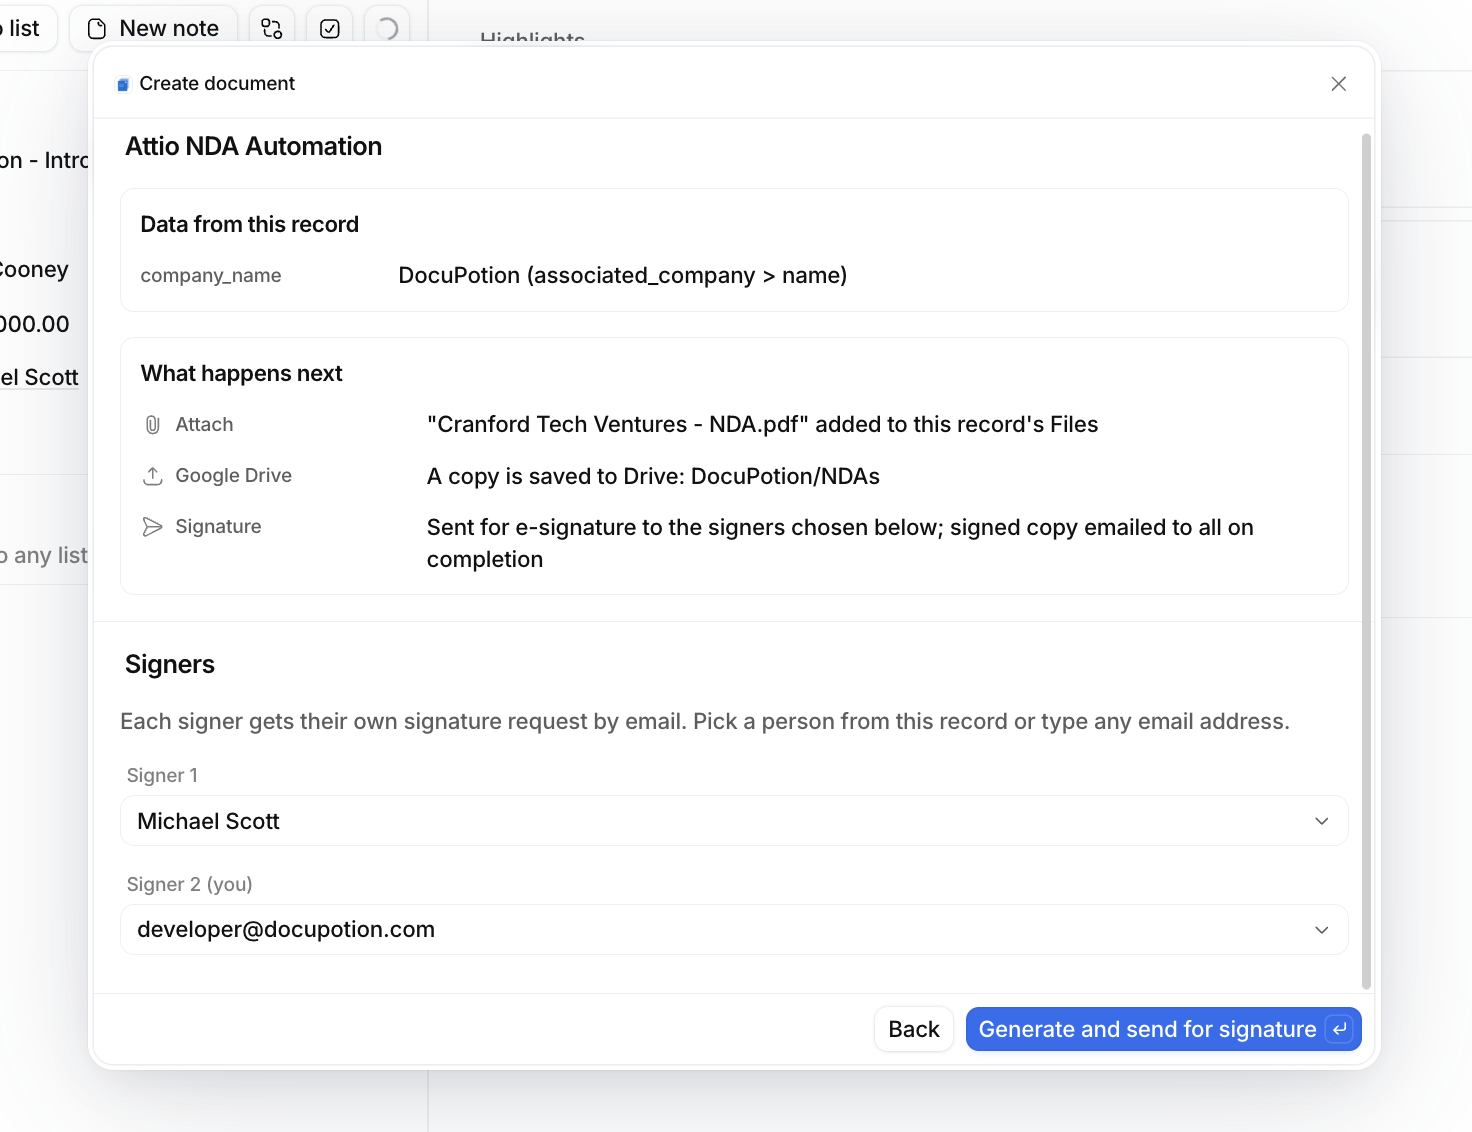
Click Generate and send for signature. The document is generated from the record's data, attached to the record's files, and each signer receives their signature request by email.
Each signer needs their own email address
Signature requests are personal, so two signers cannot share one email address. The dialog checks this before sending.
Step 4: Track progress
You can follow the signature status from either side:
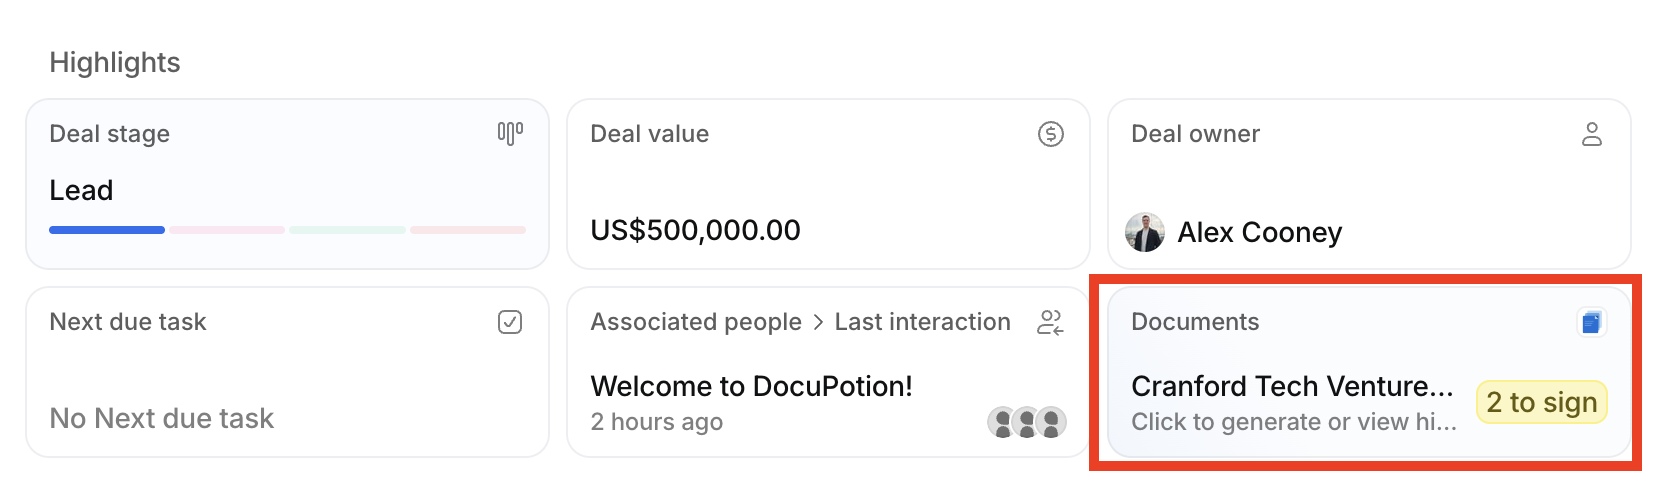
In Attio: the DocuPotion Documents widget on the record shows the live status, for example "1 of 2 signed", then "Signed" when complete. Open View documents for the full history.
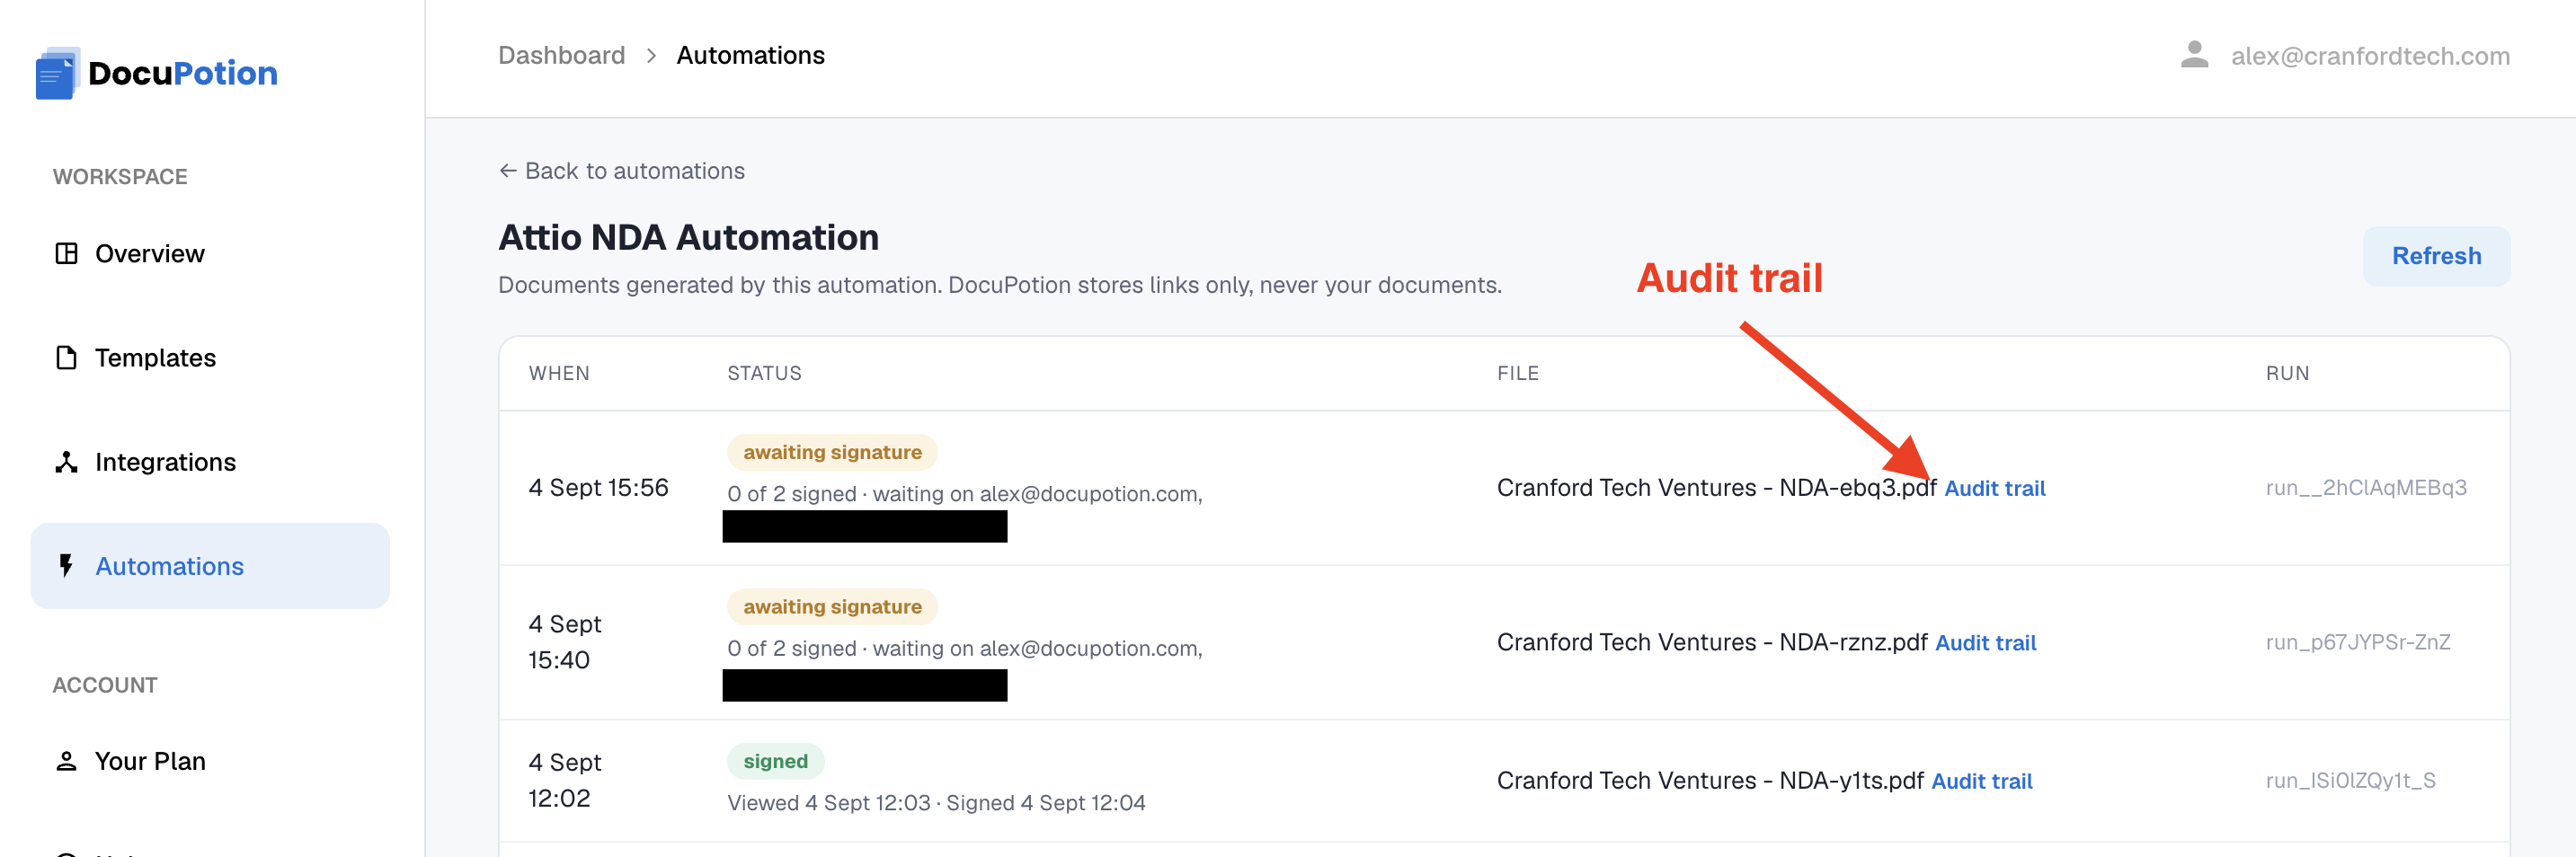
- In DocuPotion: the Automations tab's run history shows every document, who has signed, who is still pending, and lets you download the audit trail.
When the last signer completes, the sealed copy is attached to the Attio record automatically and emailed to every party.
Troubleshooting
- "Every signer needs a signature field": one of your signers only has date, initials or text fields. Add a signature field for them in the template, or reassign those fields to another signer.
- A signer did not receive the email: ask them to check spam, and confirm the address in the run history. You can generate the document again to send a fresh request.
- The dialog says to reconnect DocuPotion: the workspace connection is no longer valid. In Attio, open Apps, choose DocuPotion, remove the connection, then click Connect and approve again.