Quickstart (Airtable integration) - Creating a PDF from Airtable data
Here's how to create PDF documents from your Airtable data with DocuPotion:
- Create a reusable template
- Generate your Airtable Automation script
- Set up the automation in Airtable
Bonus tip
Create a reusable template
Estimated time: 1-20 minutes (depends on how complex your PDF document is)
Navigate to the Templates section of your DocuPotion dashboard and click on the New Template button. You'll have 3 options for creating a new template:
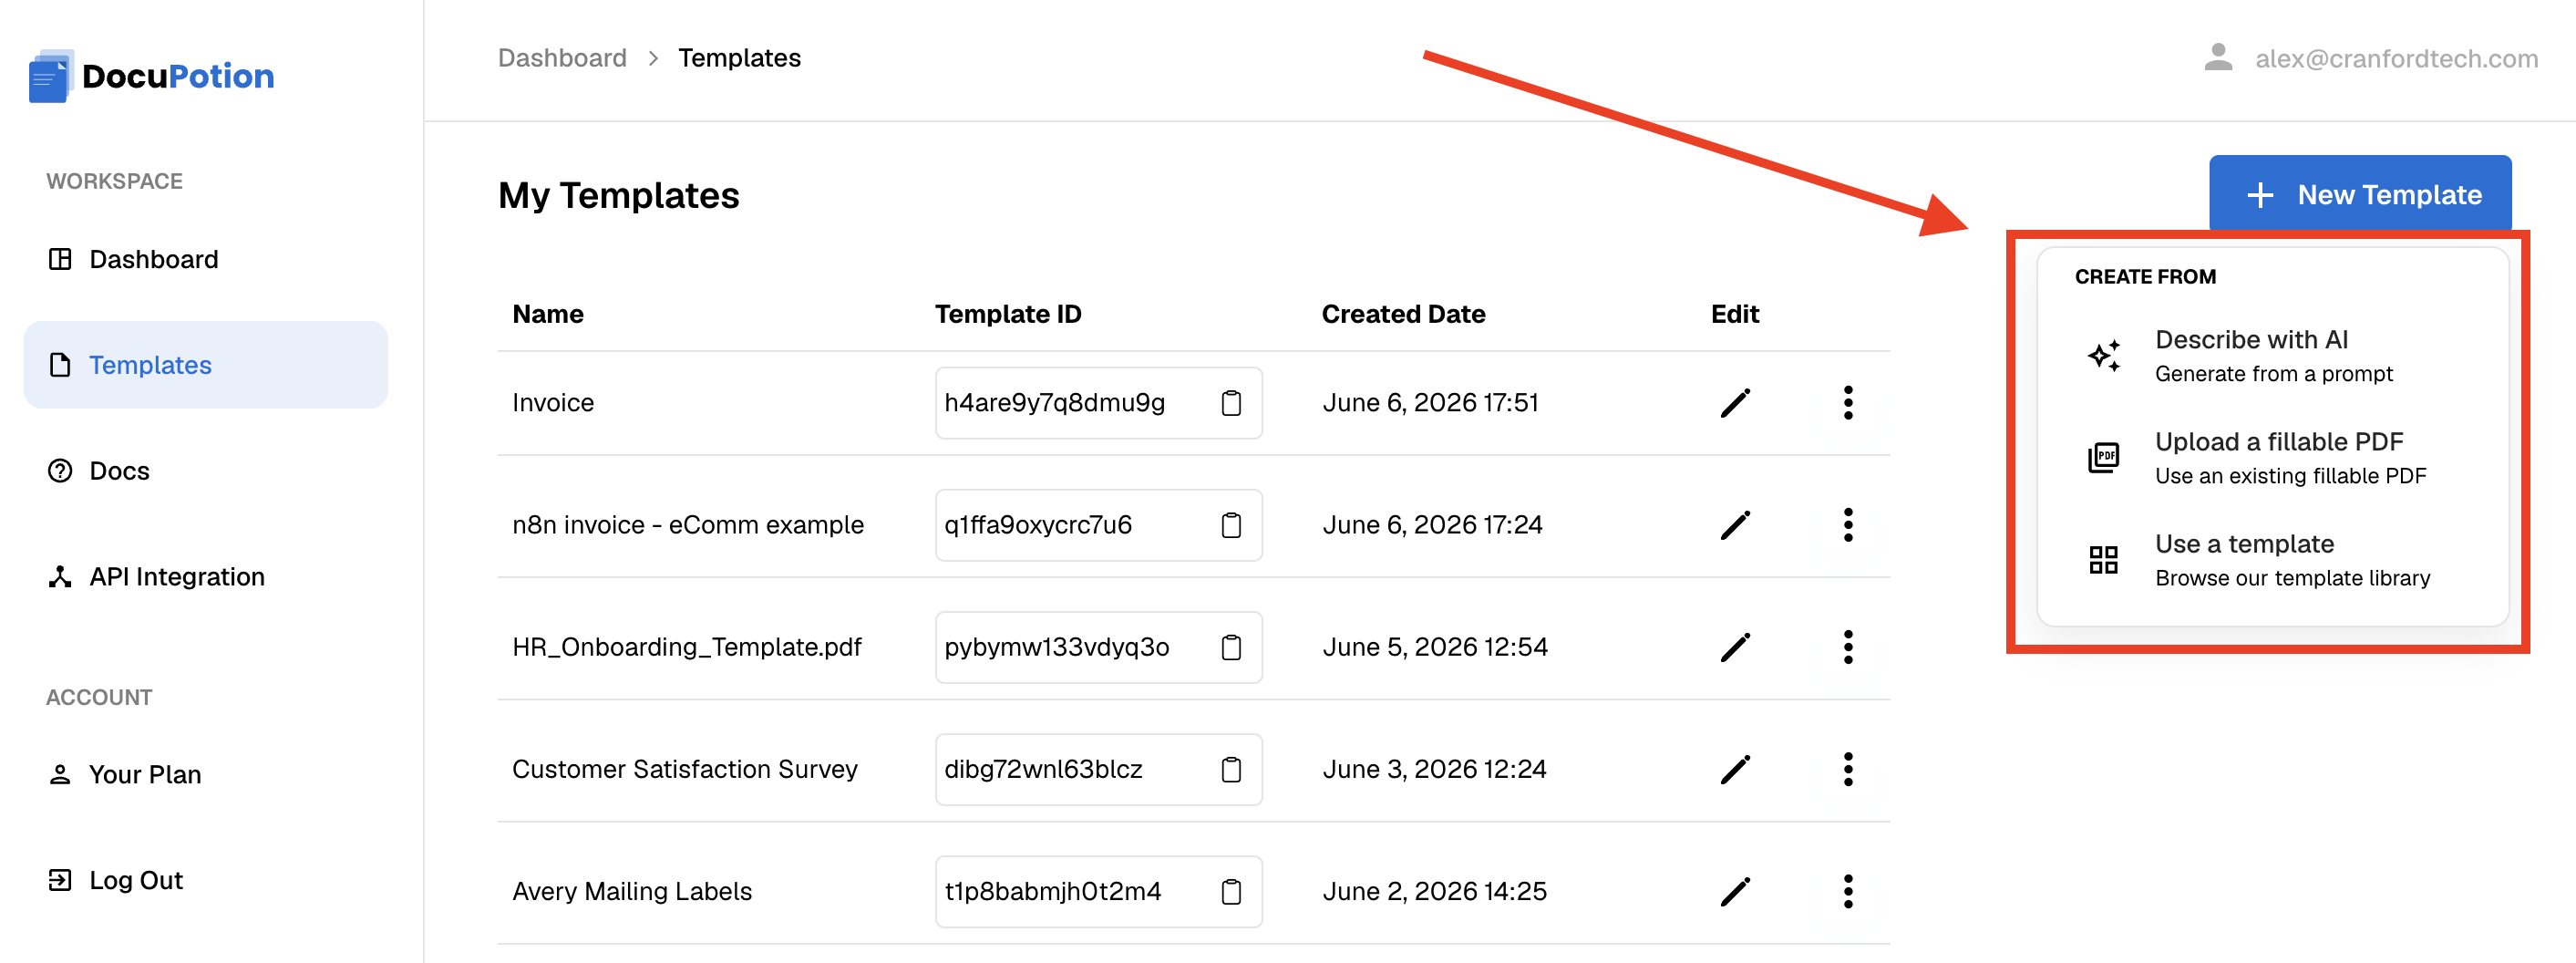
Describe with AI: Create a template based on a prompt. You can also attach existing PDF or HTML files for reference. See this doc for full instructions.
Upload a fillable PDF: Choose this option if you have an existing fillable PDF and you want to automatically populate it using DocuPotion. See this doc for full instructions.
Use a template: Our library templates cover a range of common use cases like invoices, contracts, certificates and more. You can pick a library template and then refine it with follow-up AI prompts (like you would interact with Chat GPT. See this doc for full instructions.
Once you've picked an option, you'll be brought to the DocuPotion template editor.
Generate your Airtable Automation Script
Estimated time: 2 minutes
Once you're happy with your template click on the 'Integrations' tab and select the 'Airtable' option. This will open up a popup:

This popup allows you to generate a script that you can use in Airtable Automations to generate PDFs of DocuPotion templates.
Important: The {{merge_fields}} in your template (or mapped fields for fillable PDF template) must exactly match the name of the columns in your Airtable table. EG if you have an Airtable column called 'Customer Name', then the{{merge_field}} in your template must be exactly{{Customer Name}} . You can refine your merge field names by asking the AI to edit the field names.
EG you can submit a message like:
"Please change the {{customer}} value to {{Customer Name}} "
Add the URL of the Airtable Table you're generating the PDF from to the Table URL field:

Type in the value of the Airtable field you want the generated PDF to be uploaded to. This field must be an Attachment field.

Choose whether you want the generated PDF to overwrite any existing files you have in your 'Attachment' field by checking/unchecking the Overwrite Existing Attachments box.

Click on the 'Generate Script' button to generate the Automation script.

You'll use this script in your Airtable Automation (see next step).
Set up the Automation in Airtable
Estimated time: 3-5 minutes
Navigate to the Automation tab in your Airtable dashboard and Add a Trigger. In the below example, we've added a Checkbox (called 'Generate PDF') to our Airtable table and are triggering the automation whenever a user checks the checkbox:

Next, add a 'Run a Script' action to the automation. You'll be brought to a editor. Paste in the script generated in the previous script:

Add record_id as an input and use data from the Airtable record ID.
Please note that you must use the exact spelling record_id for the name of the Input.

Save down your automation. Now whenever you check the Generate PDF checkbox, your automation will create a PDF from your DocuPotion template with your Airtable data.

Debugging errors with the Automation
If you're running the Automation but not getting any PDF returned, you can follow these steps to figure out the issue:
Navigate to the Automations tab and open up the Automation you're using to generate the PDF:
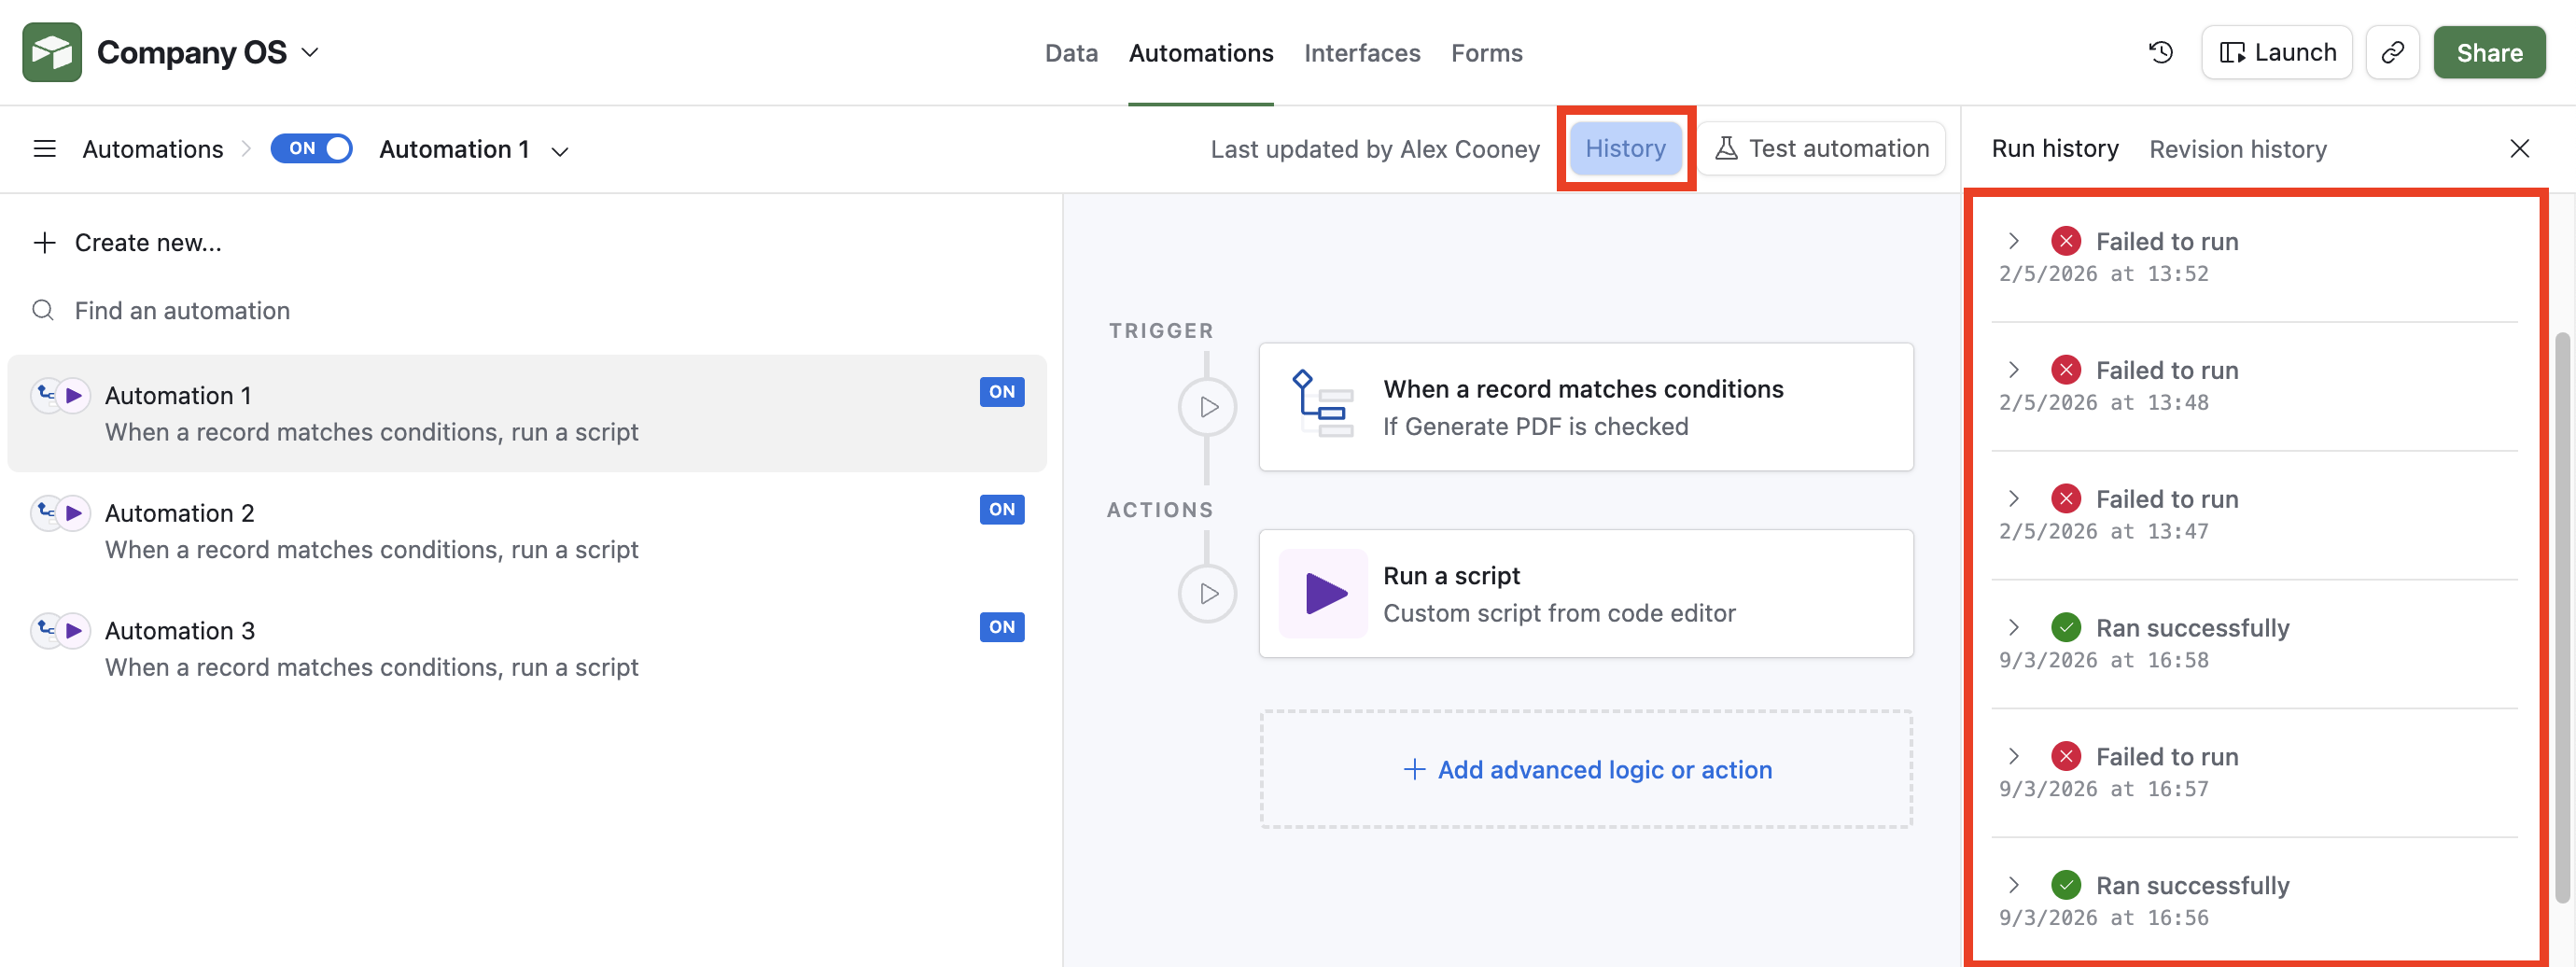
You'll likely see that you have an Automation that Failed to run. Click on one of the failed runs. It's usually the Run a Script section that causes the issue. Click into that and then on the Execution log -> View button:
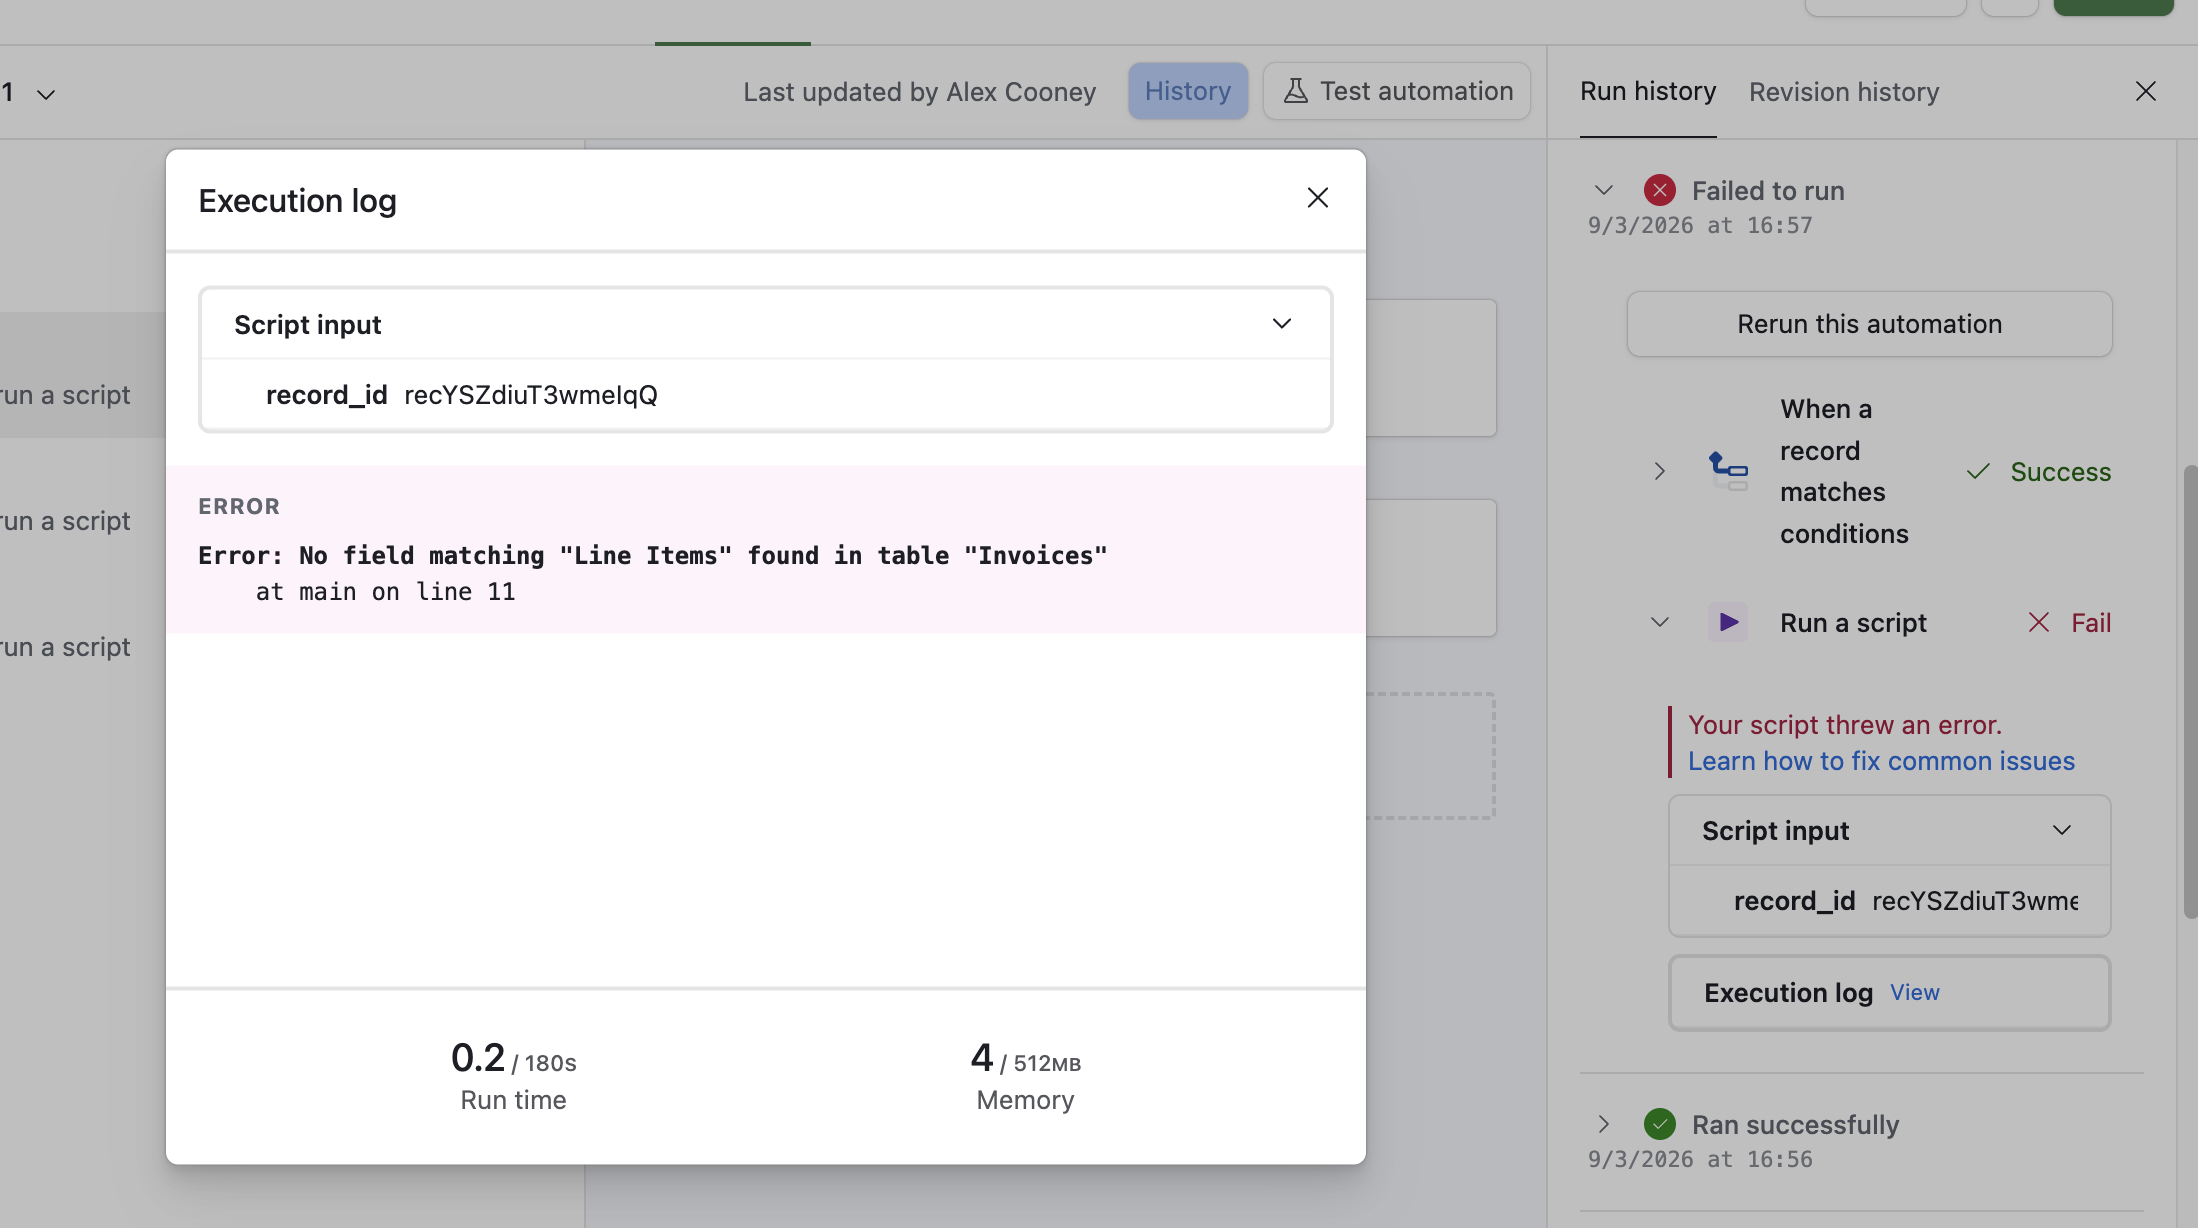
In the above example, our Automation Script was looking for a field called Line Items in the linked Invoices table, but we had named it something different.
The solution for this specific error is to ensure the {{merge_fields}}in your template have the exact same name as the column names in your Airtable table.