Quickstart (Bubble integration) - Creating a PDF from a template
Here's how create PDFs from a template with DocuPotion:
- Install the DocuPotion Bubble plugin
- Create a reusable template
- Build the Bubble workflow to generate the PDF
Bonus tips:
Install the DocuPotion Bubble plugin
Go the 'plugins' tab in the editor of the Bubble app that you're using DocuPotion in. Search for DocuPotion and install the free plugin.

Get your API key from the API Integration tab in your DocuPotion dashboard and copy and paste it into the 'API Key' and 'API Key - dev.' fields in the 'Plugins' tab.

Note: DocuPotion does not provide separate API Keys for dev and live versions of your app. You use the same API Key for both.
Create a reusable template
Navigate to the Templates section of your DocuPotion dashboard and click on the New Template button. You'll have 3 options for creating a new template:
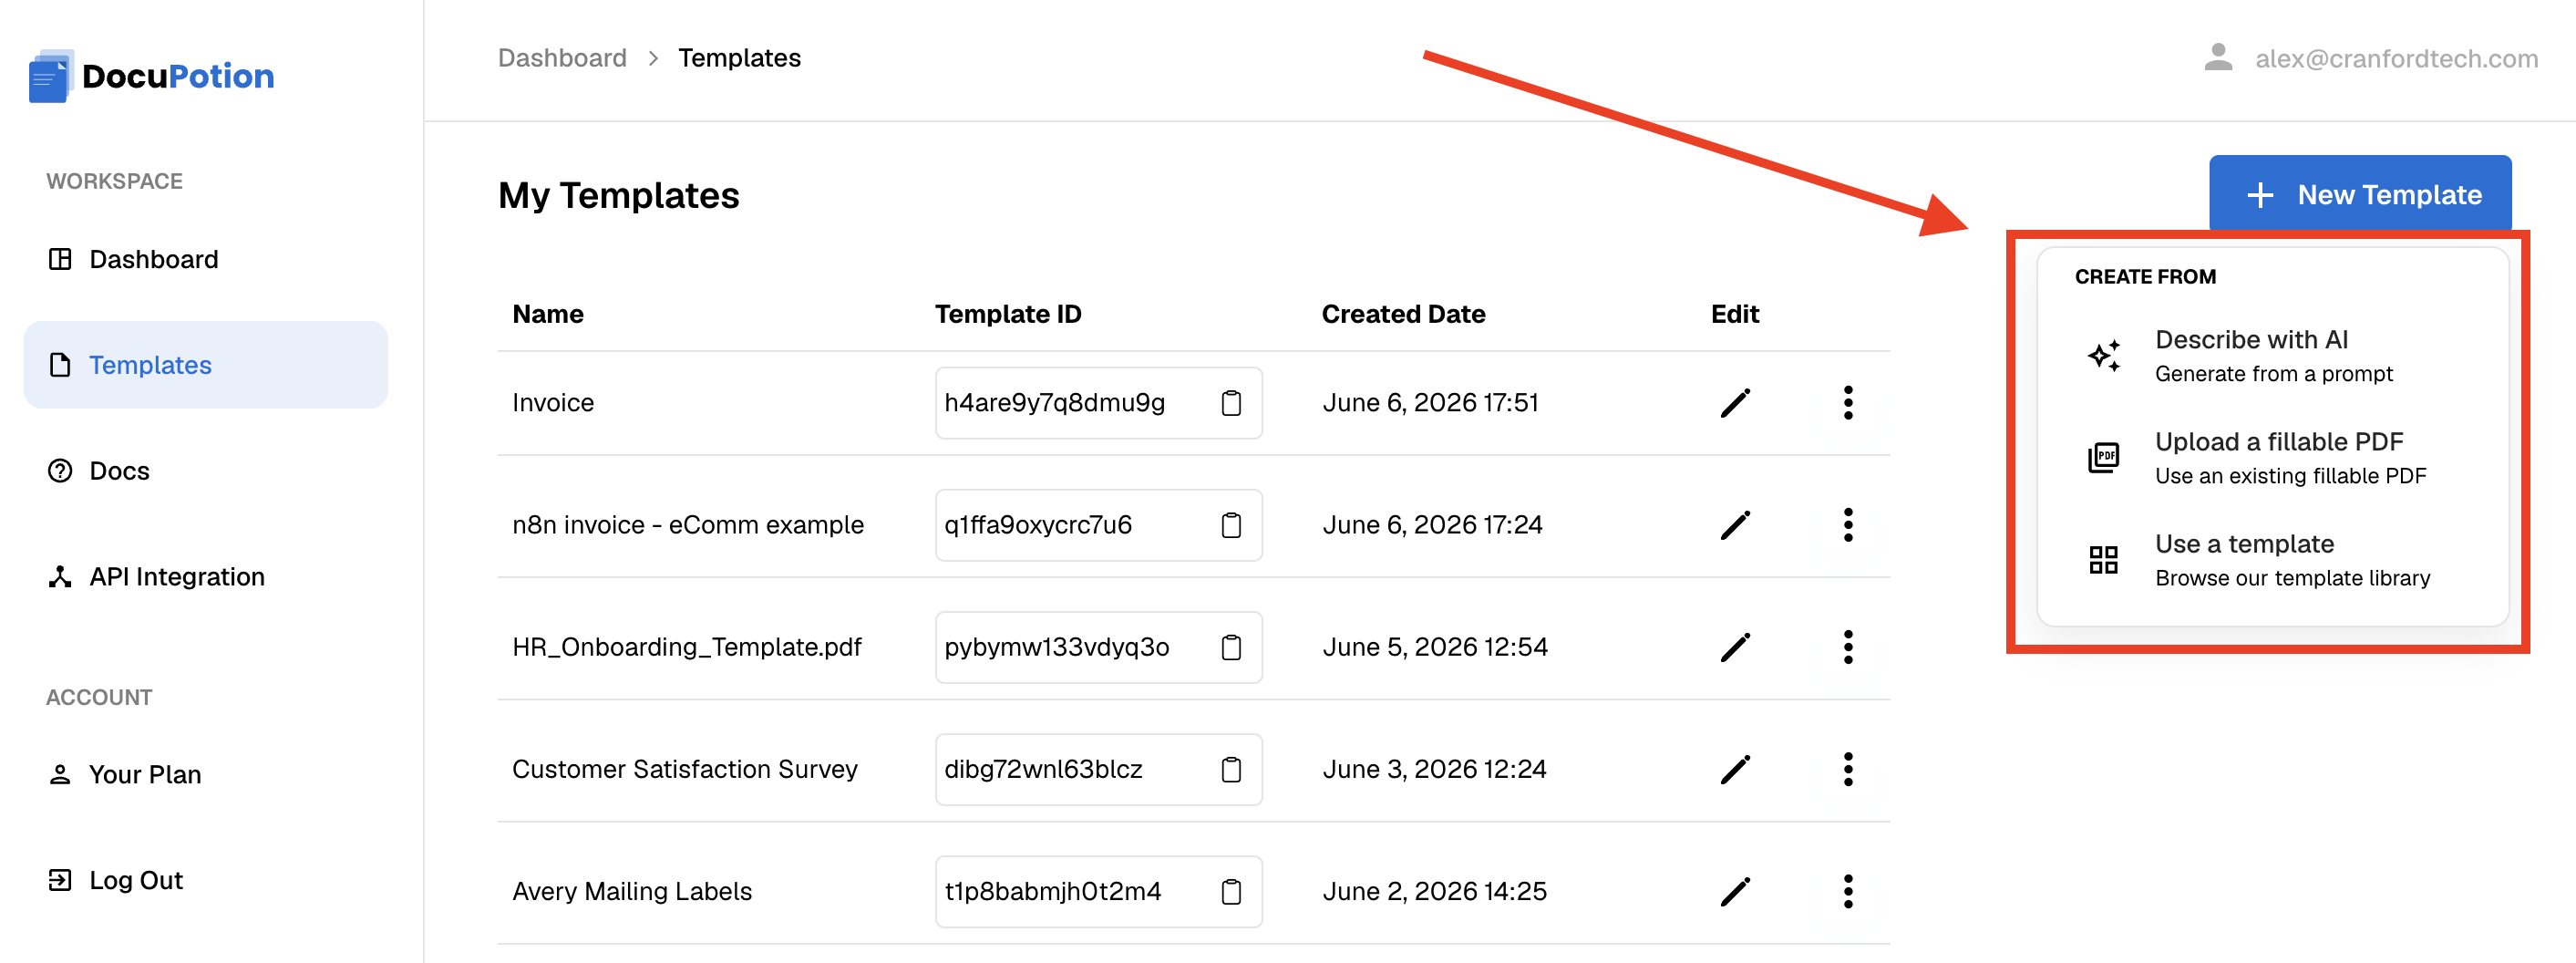
Describe with AI: Create a template based on a prompt. You can also attach existing PDF or HTML files for reference. See this doc for full instructions.
Upload a fillable PDF: Choose this option if you have an existing fillable PDF and you want to automatically populate it using DocuPotion. See this doc for full instructions.
Use a template: Our library templates cover a range of common use cases like invoices, contracts, certificates and more. You can pick a library template and then refine it with follow-up AI prompts (like you would interact with Chat GPT. See this doc for full instructions.
Once you've picked an option, you'll be brought to the DocuPotion template editor.
Build the Bubble workflow to generate the PDF
Estimated time: 1-5 minutes
Once you've installed the DocuPotion plugin, you'll now have access to a workflow action called 'Create PDF from Template'. Add this action to the workflow that will trigger your PDF creation:

You'll need to add the Template ID and any custom data you're adding to the PDF to the 'Template ID' and 'JSON Data' fields on the action. You can get the Template ID from the template editor or in the Templates tab of your dashboard:

The JSON data will be the custom data that populates your PDF (based on any {{ }} variables you've used in the editor). See this section for more details on building JSON in Bubble.

Add the 'Download PDF from Base64' action immediately after the 'Create PDF from template action' and set the 'Base64' to be equal to the Result of the prior step's Base64 content:

This will let your user download the PDF immediately:

Building JSON
In order to populate the PDF template with your own custom data, you'll need to add JSON to the 'JSON Data' field in the 'Create PDF from Template' action.
If suitable you can use static data:

But you're more likely going to want to reference data from your Bubble database. If you're referencing a single value, it's recommended you use the Bubble 'formatted as JSON-safe' operator:

If you're referencing a list of things from your Bubble database, you can use the 'format as text' operator to produce an array of things for the JSON:

Here are some screenshots of the same setup:
:format as text operator

Uploading the PDF to your Bubble database
If you want to upload the created PDF to your Bubble database, you can add the 'Upload PDF from Base64' action to your workflow.
- For the 'Website Home URL', you'll need to add the dynamic expression 'Website home URL' and
- For the 'Base64' field you'll need to add the Result of the Create PDF from Template's Base64 content

You can save down a link to the uploaded PDF by referencing the result of this step:
