Quickstart
Here's how to get started creating documents with DocuPotion:
Grab your API Key
Estimated time: 1 minute
Your API key is generated automatically when you sign up — no extra step required. To find it:
- Open your DocuPotion dashboard.
- Go to the API Integration section.
- Copy the key and store it somewhere safe.

Treat the key like a password
The API key authenticates every request you make to DocuPotion. Don't ship it in frontend code or commit it to version control. Keep it in your backend environment variables.
Create a reusable template
Estimated time: 1-20 minutes (depends on how complex your PDF document is)
Navigate to the Templates section of your DocuPotion dashboard and click on the New Template button. You'll have 3 options for creating a new template:
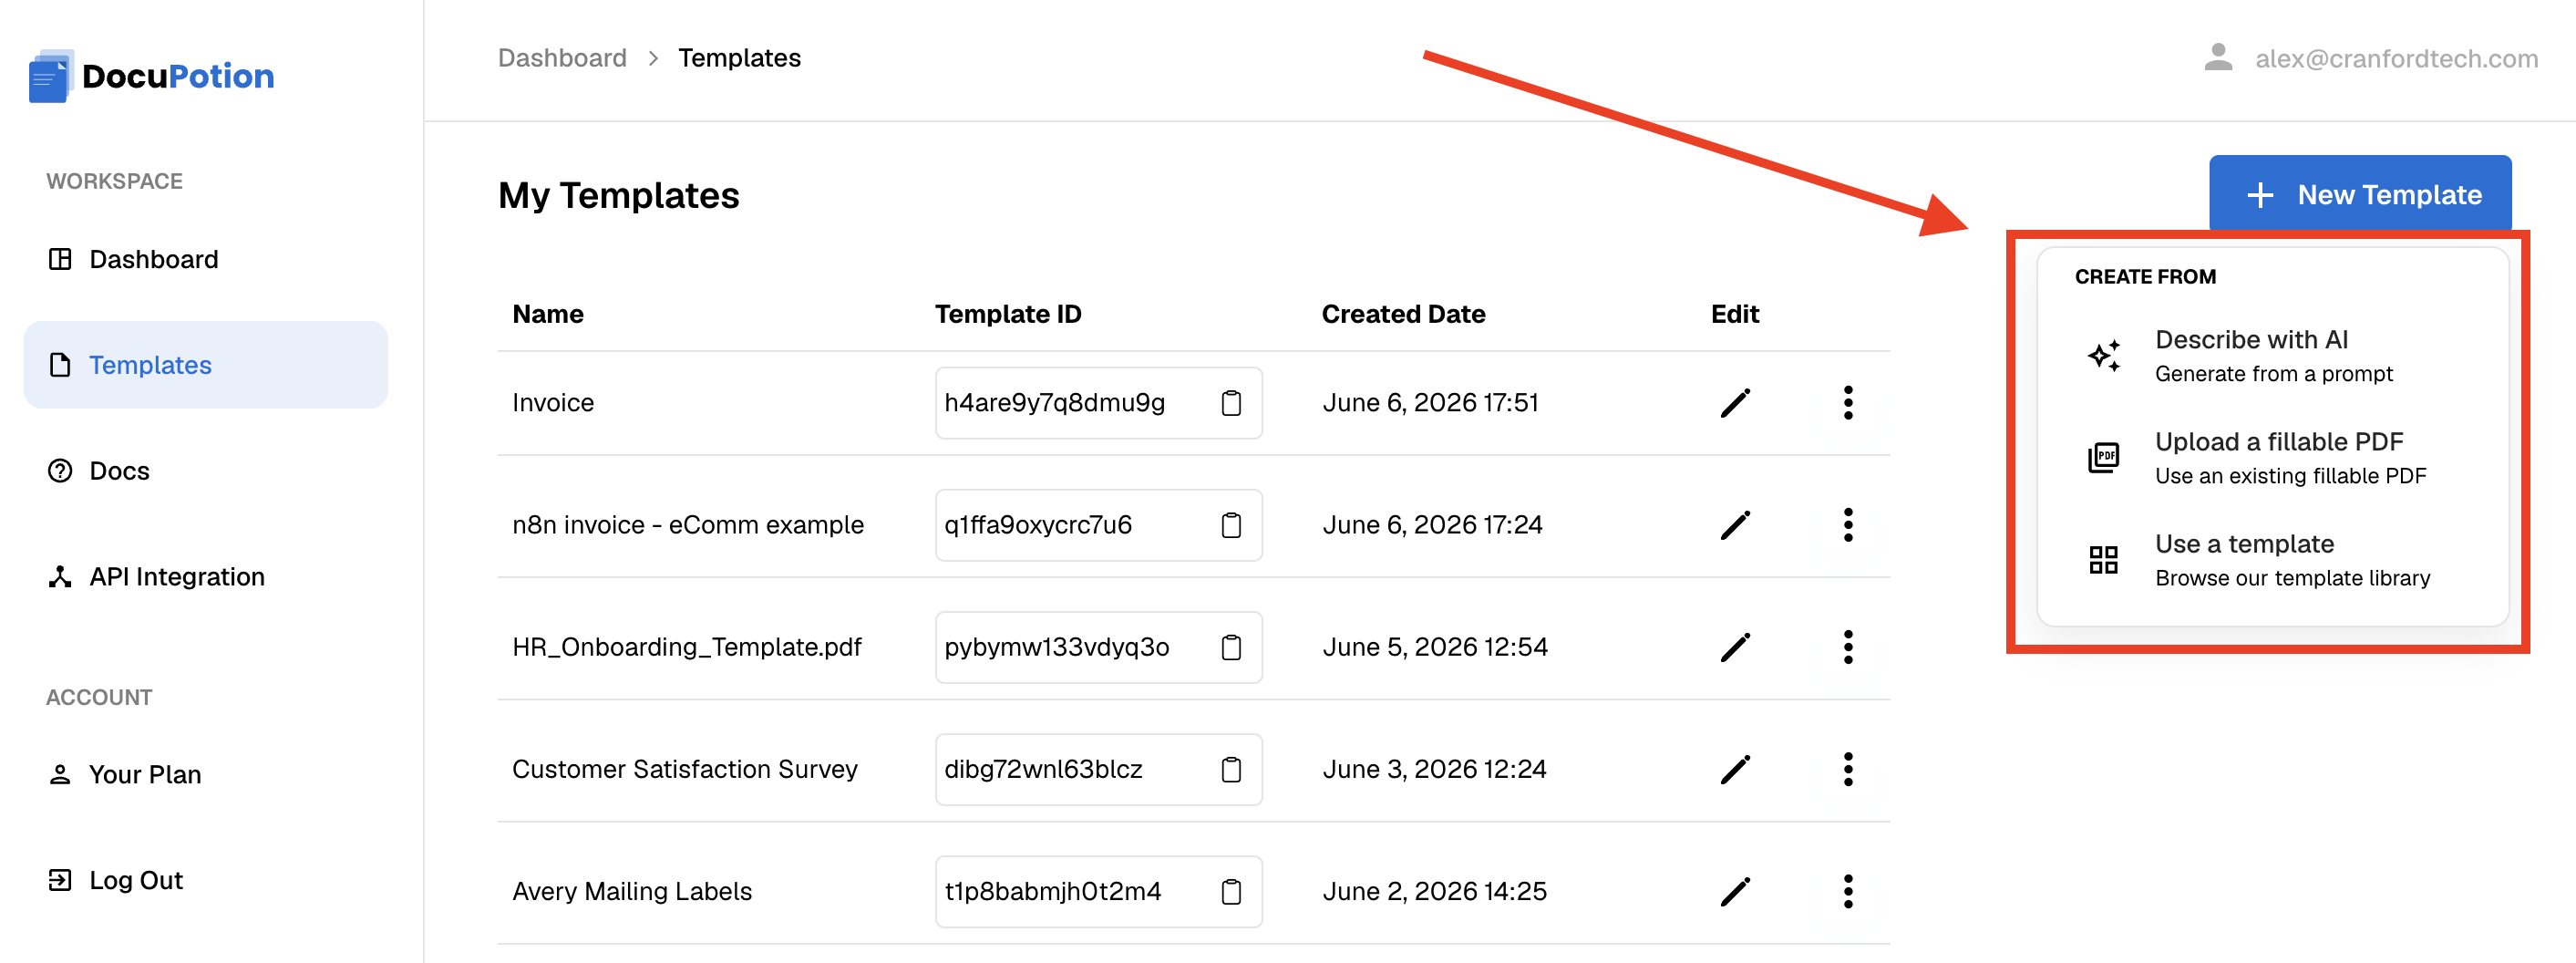
Describe with AI: Create a template based on a prompt. You can also attach existing PDF or HTML files for reference. See this doc for full instructions.
Upload a fillable PDF: Choose this option if you have an existing fillable PDF and you want to automatically populate it using DocuPotion. See this doc for full instructions.
Use a template: Our library templates cover a range of common use cases like invoices, contracts, certificates and more. You can pick a library template and then refine it with follow-up AI prompts (like you would interact with Chat GPT. See this doc for full instructions.
Once you've picked an option, you'll be brought to the DocuPotion template editor.
Generate a PDF via the DocuPotion API
Estimated time: 1-5 minutes
There's one endpoint you need:
POST https://api.docupotion.com/v1/create
All API requests must include your API key in the Authorization header:
Authorization: Bearer YOUR_API_KEY
Request body
| Field | Description |
|---|---|
| templateId | Required. The Template ID from the Vibe Editor. |
| data | Object of merge-field values. Keys must match the variables in your template's Data tab exactly. |
| output | "base64" (default) returns the file bytes encoded inline, or "url" returns a presigned download URL. |
| expiration | Only valid with output: "url" . Minutes the URL stays live — 1 to 10080 (7 days). Defaults to 60 . |
| s3_bucket, s3_key | Optional. Route the generated file to your own S3 bucket instead of DocuPotion-managed storage. See Bring Your Own Storage. |
Example request
  -H "Content-Type: application/json" \
  -H "x-api-key: YOUR_API_KEY" \
  -d '{
    "templateId": "i22b48vzap902r5",
    "output": "url",
    "format": "pdf",
    "expiration": 60,
    "data": {
      "company_name": "Acme Studios",
      "invoice_number": "INV-0421",
      "date_issued": "2026-04-22",
      "date_due": "2026-05-22",
      "client_name": "Globex Corporation",
      "total": "$4,250.00"
    }
  }'
Response
When output: "url" :
{
  "url": "https://...amazonaws.com/...signed-url..."
}
When output: "base64" :
{
  "base64": "JVBERi0xLjQKJe...",
  "fileName": "document.pdf"
}
Pick the right output type
Use url when you want to share or stream the file (emails, webhooks, client downloads). Use base64 when your backend needs the bytes directly (e.g. to attach to an outbound email or save to your own storage)
You're done
A few places to go next:
- Full API reference: for full details on using the DocuPotion API
- Bring Your Own S3 Storage: route generated files directly into your own bucket.
- DocuPotion support